
A giant glowing pumpkin in the yard looks like the kind of Halloween magic that requires a workshop, three ladders, and a suspicious amount of wizard training. Happily, it does not. With a handful of hula hoops, orange LED lights, basic fasteners, and a little creative confidence, you can build a cheerful oversized pumpkin that lights up after dark.
This DIY hula hoop pumpkin is lightweight, budget-friendly, and big enough to make a front porch, driveway, trunk-or-treat display, or fall party feel instantly more festive. Better still, it is a no-carve pumpkin decoration. No scooping seeds, no sad collapsing squash, and no accidental pumpkin-goop manicure.
The basic idea is wonderfully simple: hula hoops become the round ribs of the pumpkin, lights make the shape glow, and a playful green stem turns a collection of circles into an unmistakable fall showpiece. Here is how to make it sturdy, bright, and charmingly pumpkin-ish rather than like a confused planetarium model.
Why a Light-Up Hula Hoop Pumpkin Works So Well
Most fall decorations are either small enough to disappear from the curb or large enough to require a storage unit. A hula hoop pumpkin lands in the sweet spot. It has real visual scale, but its parts are light, inexpensive, and easy to pack away after the season.
The open frame also solves a common outdoor-decor problem: darkness. A painted wood pumpkin can look fantastic at noon and vanish at 7:15 p.m. A light-up pumpkin decoration, on the other hand, keeps performing long after the sun clocks out. Orange LED string lights trace the curved hoops and create a warm, lantern-like outline that is visible without looking like an airport runway.
It is also a flexible project. Make one pumpkin for a small porch, build a trio in different sizes for a pumpkin patch effect, or use several hoops to create one enormous centerpiece. The design can be rustic, spooky, elegant, silly, or all four at once. Halloween has room for both haunted mansions and smiling gourds wearing tiny hats.
Materials for a DIY Hula Hoop Pumpkin
Gather your supplies before you start. A basic version can be finished in an afternoon, although spray paint drying time has a talent for turning “quick craft” into “why is the weather suddenly humid?”
Essential Supplies
- Five or six matching hula hoops, ideally 28 to 36 inches wide
- Outdoor-rated orange LED string lights or battery-powered LED fairy lights
- Heavy-duty zip ties in orange, green, or black
- Outdoor-safe floral wire, twist ties, or cable clips
- Orange spray paint rated for plastic, if your hoops are not already orange
- A short pool noodle, foam cylinder, or rolled piece of green plastic for the stem
- Green spray paint, green duct tape, or green outdoor fabric for the stem
- Two to four garden stakes, tent stakes, or landscape staples for outdoor anchoring
- Scissors, wire cutters, and work gloves
Optional Details That Add Personality
- Orange deco mesh, tulle, or translucent fabric to soften the open frame
- Artificial leaves, faux vines, or raffia around the stem
- A timer, remote control, or solar-powered lighting option
- Black felt shapes for a jack-o’-lantern face
- Warm white lights for a softer harvest look
- Purple or green lights for a more mischievous Halloween mood
For an outdoor display, choose lights and extension cords specifically marked for outdoor use. Battery-powered lights are especially convenient when you are placing the pumpkin far from an outlet. They also reduce the amount of cord that can wander across a walkway like a tiny plastic snake with poor boundaries.
Plan the Shape Before You Build
A pumpkin is not a perfect ball. It is round, a little squat, and divided into soft vertical sections. Your hula hoops will create those sections. Before attaching anything, lay the hoops on the ground and decide how many ribs you want.
Five hoops create a nicely rounded pumpkin with a simple, graphic look. Six hoops make the form fuller and more symmetrical. Matching hoops are easiest to work with, but slightly different sizes can produce a charmingly lumpy pumpkin. Nature rarely makes perfectly identical pumpkins, and your decor does not need to audition for a geometry textbook.
Decide where the pumpkin will live before you commit. A 30-inch hoop pumpkin may become roughly 30 to 40 inches wide once assembled, depending on how far you spread the hoops. Leave enough room for passersby, trick-or-treaters, pets, and anyone carrying a very full bowl of chili.
Step-by-Step: Build the Hula Hoop Pumpkin Frame
Step 1: Prep and Paint the Hula Hoops
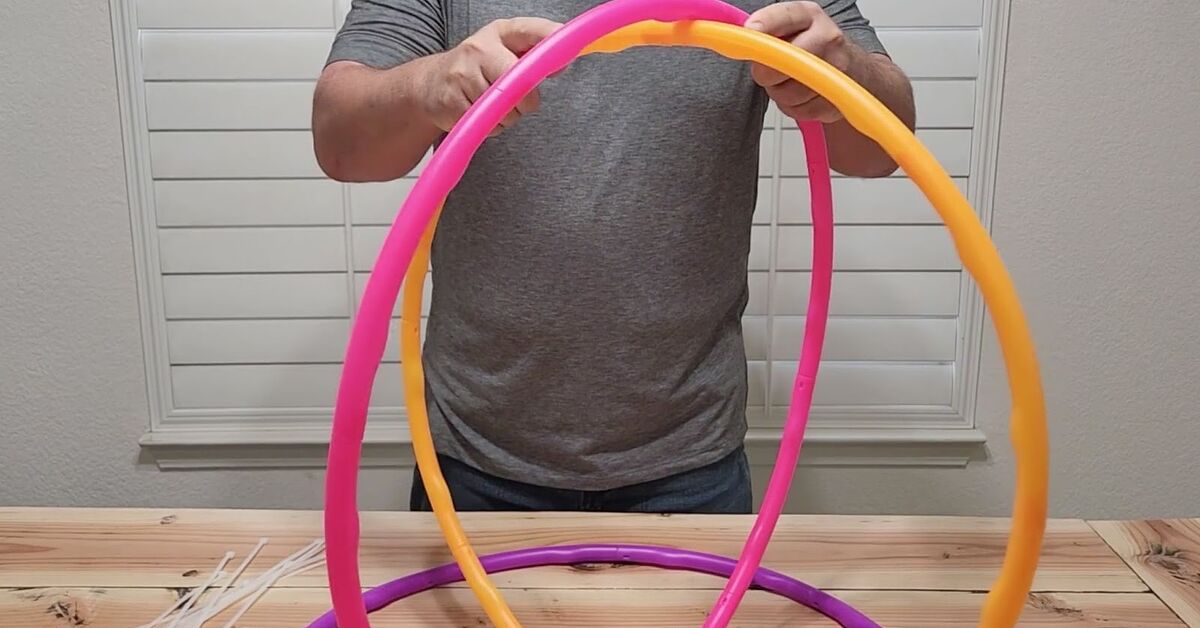
Clean the hoops with a damp cloth and let them dry. If they are bright neon pink, lime green, or decorated like a 1997 birthday party, spray-paint them orange. Use paint formulated for plastic, apply light coats, and let each coat dry fully. Painting is optional if the hoops will be completely wrapped in orange lights or mesh, but orange hoops help the pumpkin look finished during daylight.
Paint the stem material green at the same time. A short pool noodle works surprisingly well because it is lightweight, easy to cut, and naturally a little whimsical. A pumpkin stem should not look too polished; it should look like it has been working hard in a field and maybe has a few opinions about squirrels.
Step 2: Create the Top Hub
Stand the first hula hoop upright. Add a second hoop so it crosses the first at the top and bottom, forming a globe-like shape. Continue adding hoops, spacing them evenly around the center point. The hoops should all meet near the top and bottom, creating vertical ribs.
At the top, use several heavy-duty zip ties to secure the hoops together. Do not tighten the first tie completely until you have checked the spacing. Adjust the hoops so the sections look reasonably even, then add more zip ties until the top hub feels firm.
Trim the long tails from the ties. Turn the cut ends inward or cover them with tape so they do not snag clothing, scratch hands, or develop a personal feud with your front-door wreath.
Step 3: Secure the Bottom Hub
Bring the lower sections of the hoops together and secure them with zip ties in the same way. This gives the pumpkin its basic cage shape. Set the structure on the ground, step back, and adjust the ribs until the pumpkin looks round and slightly flattened rather than tall and egg-shaped.
For a wider pumpkin, gently spread the hoop sections at the middle. For a taller pumpkin, keep the ribs closer together. Small adjustments make a surprisingly big difference, so this is the moment to trust your eyes rather than a ruler.
Step 4: Reinforce the Middle, If Needed
If your hula hoops are flimsy or the pumpkin will sit in a windy spot, add a few zip ties where the hoops touch at the middle. You can also run a length of floral wire between opposite hoops to stabilize the shape. Keep the reinforcement tidy and avoid sharp wire ends.
Do not attach lights yet. It is much easier to correct a crooked frame before it is wearing 100 tiny glowing bulbs like jewelry.
How to Add Lights to Your Pumpkin
Choose the Best Lighting Style
Orange LED string lights are the most direct route to a glowing pumpkin. They outline each hoop and make the ribbed shape visible from a distance. Warm white LEDs offer a cozy farmhouse effect, while multicolor LEDs can make the display feel more playful.
Battery-operated lights are excellent for porches, apartment entries, or places without an outdoor outlet. Outdoor-rated plug-in LEDs are a good choice for a large yard display, provided the connection is protected from rain and the cord is routed safely. Solar stake lights can also be tucked inside the pumpkin for a subtle evening glow, though they generally produce a gentler effect than string lights.
Wrap the Lights Evenly
Start at the top hub. Wrap one light strand down a hoop, around the bottom hub, and back up the next hoop. Continue until you have traced all the ribs. Secure the strand loosely with cable clips, soft twist ties, or zip ties placed around the hoop itself.
Never pinch, staple through, or tightly crush the light wire. The goal is to hold the lights in place without damaging the insulation. Keep the plugs and battery pack accessible, because future-you will appreciate not having to dismantle a glowing pumpkin just to find one switch.
For a fuller glow, weave a second strand around the middle of the frame or wrap lights in a loose spiral from top to bottom. Avoid wrapping so densely that the pumpkin becomes visually busy. The curved outline is the star of the show; it does not need to compete with a miniature Las Vegas sign.
Add a Diffused Glow With Mesh or Fabric
If you want the pumpkin to look fuller in daylight, weave strips of orange deco mesh, sheer fabric, or weather-resistant tulle between the hoops. Leave gaps so the structure can breathe and the lights remain visible. A translucent material creates a soft glowing body at night, while opaque fabric may block too much light.
Use only materials that are suitable for the display environment, keep them clear of any heat source, and avoid placing fabric directly over plugs, control boxes, or damaged wires. LED lights run cooler than old-fashioned incandescent strings, but a smart crafter still treats electrical decorations with respect.
Finish the Pumpkin Stem and Vines
Attach your green stem to the top hub after the lights are in place. A 6- to 10-inch piece of pool noodle can be taped, wired, or zip-tied upright. Angle it slightly to one side for a more natural shape. Wrap it in green tape, paint it, or cover it with green fabric.
Add faux leaves, silk vines, or a curled piece of green floral wire around the base of the stem. This small detail does a lot of visual work. Without it, the structure may read as “glowing orange orb.” With it, it becomes “giant pumpkin that clearly belongs in an autumn magazine spread.”
For a friendly jack-o’-lantern version, cut eyes and a grin from black felt or thin craft foam and attach them to the front ribs. Keep the pieces lightweight so they do not sag. You can also make a ghost-pumpkin hybrid with white lights and a goofy face, because Halloween rules are more like enthusiastic suggestions.
Anchor Your Outdoor Pumpkin Securely
A hula hoop pumpkin is light enough to move easily, which is lovely until a gust of wind decides it deserves a tour of the neighborhood. Anchor the bottom hub with garden stakes or landscape staples. Attach the stakes to the hoop frame with wire or zip ties, keeping them away from electrical cords.
For a patio display, place small sandbags, decorative bags of gravel, or weighted planters around the base. Hide the weights with fall leaves, mums, hay bales, or a few real pumpkins. Keep the decoration out of traffic paths and away from doors that swing open. A decorative pumpkin should greet guests, not test their balance.
Lighting and Weather Safety for Outdoor Halloween Decor
Before switching on your hula hoop pumpkin, inspect every light strand, plug, battery pack, and cord. Replace lights with cracked sockets, exposed wires, loose connections, or other signs of damage. Use outdoor-rated equipment outdoors, follow the manufacturer’s limits for connecting light sets, and avoid overloading outlets or extension cords.
Place plug connections off the ground and protect them from standing water. Use a ground-fault circuit interrupter-protected outlet for outdoor electric decorations. Secure cords so they are not pinched in doors or windows, buried under rugs, or stretched across a walkway. Turn off the lights when you leave home or go to sleep.
Skip real candles entirely for this project. Battery-powered LED lights, glow sticks, or outdoor-rated string lights deliver the pumpkin glow without adding an open flame to fabric, plastic, dry leaves, or a very excitable October evening.
Creative Variations for Your Light-Up Pumpkin
Make a Pumpkin Patch
Build three pumpkins using different hoop sizes. Use orange for the largest, white for a ghost pumpkin, and pale green for an unripe gourd look. Cluster them near a hay bale or porch steps for an instant fall scene.
Create a Candy Corn Pumpkin
Wrap the top third in white lights or white mesh, the middle in orange, and the bottom in yellow. It is not botanically accurate, but neither is candy corn, and both are somehow still invited to Halloween.
Go Elegant Instead of Spooky
Use warm white LEDs, copper wire accents, cream-colored mesh, and eucalyptus-style faux leaves. This version works from early fall through Thanksgiving and does not scream Halloween unless you add a spider wearing a bow tie.
Make It Interactive
Add a remote-controlled LED set and let children choose the color setting before trick-or-treaters arrive. Keep controls and batteries out of reach of very young children, and make the adult in charge of the remote feel extremely important for at least five minutes.
Troubleshooting Common Hula Hoop Pumpkin Problems
The Pumpkin Looks Flat
Spread the hoop ribs farther apart around the middle. Adding one additional hoop can also make the pumpkin look fuller. Check that the top and bottom hubs are centered rather than pulled to one side.
The Lights Look Uneven
Step back at dusk and identify dark sections. Add a short second strand only where needed, or shift the existing strand so each rib gets similar coverage. Daylight can be deceptive; the true lighting test happens after sunset.
The Structure Leans
Inspect the top and bottom zip ties, then rebalance the hoops. Add stakes or weights before trying to solve a leaning problem with more lights. Decorative lighting is not structural engineering, no matter how determined it looks.
The Stem Keeps Falling Over
Use two attachment points instead of one, and create a small wire support from the stem to a nearby hoop. A slightly crooked stem is charming. A stem lying on the lawn looks like the pumpkin had a long night.
Real-World Experience: What Makes This DIY Pumpkin More Fun
The first time I saw a hula hoop pumpkin, I had the same reaction many people do: “That cannot possibly be a hula hoop.” From the sidewalk, the overlapping circles looked like a giant glowing gourd that had wandered out of a storybook. Up close, the illusion was even better because the materials were so ordinary. It was proof that a good seasonal project does not need expensive lumber, special tools, or a personal relationship with a craft-store employee named Linda.
The biggest lesson from building one is to test the frame before adding decorative layers. It is tempting to start wrapping lights immediately because lights make everything look halfway finished. But spending ten extra minutes adjusting the hoops saves an hour of frustration later. When the ribs are balanced, the pumpkin reads clearly from every angle. When they are uneven, it can look more like a glowing cage for a very polite alien.
Another practical discovery is that less lighting often looks better. A single, evenly spaced orange LED strand can create a warm outline that feels magical at night. Too many strands can flatten the shape or make the display so bright that the pumpkin loses its curves. The best result usually comes from allowing the darkness between the hoops to do some of the visual work. Shadows are free, dramatic, and do not require fresh batteries.
Weather is the part that turns a cute indoor craft into a real outdoor project. A pumpkin that looks perfectly stable on a calm afternoon can become surprisingly determined to roll away after a windy evening. Anchoring the base early is much easier than chasing a glowing decoration across the lawn while wearing slippers. Garden staples, discreet weights, and sensible cord placement are not glamorous, but they are the quiet heroes of outdoor Halloween decor.
The most rewarding part is how adaptable the project becomes once the basic pumpkin shape is finished. One year, it can be a friendly jack-o’-lantern with a big crooked grin. The next year, it can become an elegant harvest pumpkin with warm white lights and faux leaves. It can welcome trick-or-treaters, brighten a school event, decorate a fall wedding, or sit on a porch simply because October deserves a little extra nonsense.
That flexibility makes the hula hoop pumpkin more than a one-time craft. Store the hoops, lights, and stem pieces together after the season, and you can reassemble the decoration with a new personality every year. In the world of seasonal crafts, that is a rare victory: a project that looks impressive, costs reasonably little, and does not leave you wondering why you own six pounds of glitter.
Conclusion
A light-up hula hoop pumpkin is a smart way to create big fall curb appeal with simple materials. Build a balanced hoop frame, add outdoor-safe LED lighting, finish it with a cheerful stem, and anchor it well. The result is a glowing DIY pumpkin decoration that feels festive during the day and genuinely magical at night.
Note: For a safer display, use battery-operated or outdoor-rated LED lights, inspect all cords before use, protect electrical connections from moisture, and never use open flames inside or near the decoration.