
There is something deeply satisfying about turning a plain IKEA cushion cover into décor that looks custom-made. It is even more satisfying when the transformation requires fabric paint, a few inexpensive tools, and absolutely no wrestling with complicated furniture instructions.
This IKEA hack for painting fabric custom DIY pillow cases is beginner-friendly, budget-conscious, and flexible enough to fit almost any decorating style. You can create bold geometric patterns, delicate botanical prints, playful polka dots, modern brushstrokes, personalized initials, or abstract shapes that suggest you attended art school without requiring you to produce a diploma.
The key is choosing the right pillow cover, preparing the fabric correctly, applying paint in light layers, and following the curing instructions for your particular product. This guide walks through the complete process, explains which supplies actually matter, and shares practical lessons learned from painting pillow covers at home.
Why Plain IKEA Pillow Covers Are Perfect for a Fabric-Painting Hack
Ready-made cushion covers eliminate the most intimidating part of a DIY pillow project: sewing a square that somehow becomes a trapezoid. IKEA offers removable cushion covers in neutral colors and standard sizes, making them useful blank canvases for fabric painting.
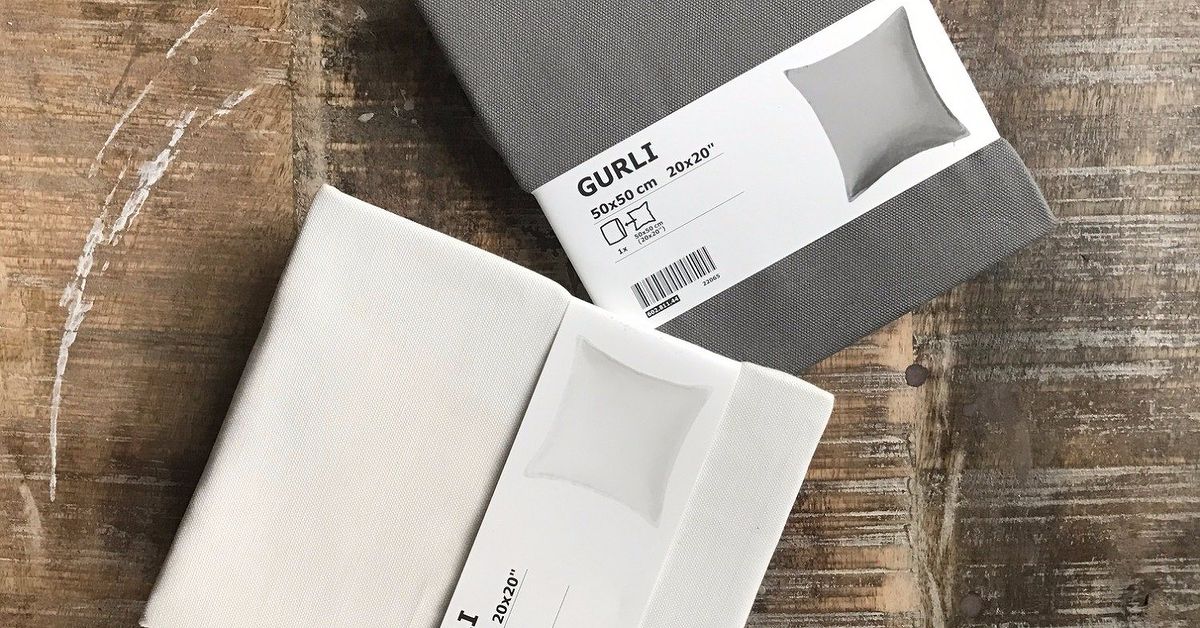
A plain woven cotton cover is generally the easiest choice. For example, IKEA describes its GURLI cushion cover as being made from 100% cotton and suitable for machine washing. A removable zipper also allows you to paint the empty cover on a flat surface instead of attempting to decorate a fully stuffed pillow that keeps rolling away like an uncooperative potato.
Velvet covers such as IKEA’s cotton-velvet SANELA line can also be customized, but their raised pile and subtle sheen make crisp stenciling more difficult. They are better suited to loose brushwork, simple metallic details, or intentionally distressed patterns. For a first project, smooth cotton provides greater control and more predictable results.
Choosing the Right Paint for DIY Pillow Cases
Dedicated Fabric Paint
Dedicated fabric paint is the simplest option because it is formulated to remain flexible after drying. It is less likely than ordinary craft paint to leave a stiff, crunchy patch that feels as though someone glued a cracker to the pillow.
Different formulas have different curing requirements. Some fabric paints need to be heat-set with an iron, while others become washable after air-curing for a specified period. Always follow the instructions printed on the paint container rather than assuming every product behaves the same way.
Acrylic Paint Mixed With Fabric Medium
Standard acrylic paint can be used when combined with a compatible fabric-painting medium. The medium improves flexibility, helps the paint bond to fibers, and reduces cracking, peeling, or fading. JOANN and DecoArt both recommend using a textile or fabric medium when adapting acrylic paint for fabric projects.
Mixing ratios vary by manufacturer. Liquitex, for example, recommends mixing its fabric medium with Soft Body Acrylic in approximately equal proportions, while DecoArt lists a two-parts-paint-to-one-part-medium ratio for one of its products. The correct lesson is not that one ratio is universally right; it is that the label on your chosen medium outranks advice from a random bottle hiding in the back of the craft drawer.
Fabric Markers and Dimensional Paint
Fabric markers work well for lettering, outlines, small illustrations, and corrections. Dimensional fabric paint can add raised dots or textured accents, but it should be used sparingly on a pillow that will regularly touch someone’s face. Decorative texture is charming until it becomes a midnight cheek stamp.
Supplies You Will Need
- One plain IKEA cushion cover
- A correctly sized pillow insert
- Fabric paint or acrylic paint with fabric medium
- Stencil brushes, foam daubers, or flat paintbrushes
- Cardboard, foam board, or a reusable printing mat
- Painter’s tape or low-tack masking tape
- Stencils, stamps, leaves, or homemade design templates
- Chalk pencil or disappearing fabric marker
- Paper plates or a washable paint palette
- Paper towels and a cup of clean water
- Iron and pressing cloth, when required by the paint manufacturer
You do not need every specialty brush available in the craft aisle. A small foam dauber is excellent for stencils, a medium flat brush handles blocks and stripes, and a fine brush manages details. Three dependable tools are more useful than a 47-piece brush set containing mysterious shapes last seen in Renaissance portrait studios.
How to Prepare an IKEA Cushion Cover for Painting
Step 1: Prewash the Cover
Wash and dry the pillow cover according to its care label before painting. Prewashing removes manufacturing residue, surface treatments, dust, and potential shrinkage. Avoid fabric softener because it may leave a coating that interferes with paint adhesion. Plaid and DecoArt both recommend prewashing fabric without softener before printing or painting.
Step 2: Press the Fabric
Iron the cover so the front panel lies flat. Wrinkles can lift stencil edges and create blurred lines. Allow the fabric to cool before applying adhesive stencils or painter’s tape.
Step 3: Insert a Protective Barrier
Slide cardboard, foam board, or a printing mat inside the empty cover. The barrier prevents paint from bleeding through to the back and creates a firm surface for stamping. Plaid specifically recommends placing a protective printing mat inside a pillow cover before applying stamped designs.
Cut the insert slightly smaller than the pillow cover so it lies flat without stretching the seams. Cover cardboard with wax paper or reusable plastic if you are concerned about damp paint sticking to it.
Step 4: Test Everything
Test your paint, brush, and technique on scrap cotton or an inconspicuous interior seam. Check the color after it dries because wet fabric paint may appear darker, brighter, or more opaque than the final result.
Four Easy Design Methods for Custom Pillow Cases
1. Painter’s-Tape Geometric Patterns
Geometric designs are forgiving because they rely on straight lines rather than advanced drawing skills. Use low-tack painter’s tape to create stripes, grids, triangles, arches, or asymmetric color blocks.
Press the tape edges firmly against the fabric. Apply paint by pouncing the brush vertically instead of sweeping it toward the tape. Heavy sideways strokes push paint underneath the edge and create fuzzy lines. Remove the tape carefully while the final coat is still slightly damp.
2. Stenciled Patterns
Stencils are ideal for repeated leaves, stars, flowers, letters, or simple motifs. Better Homes & Gardens recommends protecting exposed areas and using fabric-compatible paint when applying stenciled pillow designs.
Use a nearly dry stencil brush or foam dauber. Load the tool with paint, blot most of it onto a paper towel, and build the color gradually. Too little paint requires another pass. Too much paint produces a decorative blob that may have to be renamed “organic abstract art.”
3. Hand-Stamped Designs
Commercial stamps, hand-carved blocks, potatoes, sponges, and natural leaves can all create interesting patterns. Apply a thin, even coat of fabric paint to the stamp, press it straight down, and lift it without sliding.
Botanical printing works especially well on natural-colored cotton. Better Homes & Gardens suggests applying paint to a leaf or palm frond and transferring the shape directly to a pillow cover. Stamps can also be rotated or partially overlapped to make a pattern feel less mechanical.
4. Freehand Abstract Painting
Freehand painting is useful when perfection is not the goal. Start with large shapes, add medium-size forms, and finish with small marks or lines. Limit the palette to two or three colors so the design feels intentional.
Tightly woven cotton tends to produce stronger color and cleaner detail than loose or heavily textured fabric. Thin paint layers also remain more flexible and are less likely to crack than thick deposits.
Step-by-Step Modern Abstract Pillow Design
- Prepare the cover. Prewash, dry, iron, and place a protective board inside.
- Plan the composition. Lightly draw three or four overlapping shapes using chalk or a disappearing fabric marker.
- Choose a compact palette. Try terracotta, muted pink, and charcoal on an unbleached cover, or navy, sage, and mustard on white cotton.
- Paint the largest shape first. Apply a thin coat using a flat brush. Let it become touch-dry before adding another coat.
- Add secondary shapes. Leave small areas of the original fabric visible so the design can breathe.
- Create contrast. Add short lines, dots, or tiny arches with the darkest color.
- Inspect the surface. Fill obvious gaps but resist repainting every brushstroke. Handmade work should look handmade, not interrogated.
- Allow the design to cure. Follow the paint manufacturer’s drying and heat-setting instructions.
Drying, Curing, and Heat-Setting Fabric Paint
Drying and curing are not always the same. Paint may feel dry on the surface while the film is still developing strength underneath. Avoid inserting the pillow form, folding the cover, or washing it until the recommended curing period has passed.
Some products require ironing from the reverse side or through a pressing cloth. Others specifically state that no heat-setting is necessary. Liquitex says its professional fabric medium does not require ironing, while certain DecoArt fabric-paint products recommend allowing 48 to 72 hours before washing. Follow the directions for the exact formula you used.
When ironing is required, remove the cardboard, turn the cover inside out, and use the temperature recommended for both the fabric and paint. Keep the iron moving and protect the painted surface with a pressing cloth. Never place a hot iron directly onto dimensional paint or a finish whose instructions prohibit heat.
How to Wash a Hand-Painted Pillow Cover
Wait until the paint has fully cured. Remove the insert, turn the cover inside out, and use cold water with a gentle cycle unless the product instructions specify something different. A mild detergent is preferable to bleach or aggressive stain removers.
Air-drying usually places less stress on painted areas than high dryer heat. If machine drying is allowed, choose a low setting. IKEA notes that many cotton cushion covers are machine washable, but the addition of paint means the paint manufacturer’s care instructions must also be considered.
Common Fabric-Painting Mistakes
Applying Too Much Paint
Thick paint creates stiffness and increases the risk of cracking. Use several light coats instead of one heroic layer.
Skipping the Protective Insert
Paint can soak through the front and permanently decorate the back. Sometimes this produces an interesting surprise. Usually it produces regret.
Using a Wet Stencil Brush
A saturated brush forces paint beneath stencil edges. Blot the tool before touching the pillow cover.
Moving the Stencil Too Soon
Registering repeated patterns requires patience. Mark alignment points with small pieces of tape and clean wet paint from the back of the stencil between placements.
Washing Before the Paint Cures
Premature washing can cause fading, peeling, or transfer. “Dry to the touch” does not automatically mean “ready for laundry day.”
Forgetting the Pillow’s Actual Purpose
A heavily painted surface may be suitable for a decorative chair but uncomfortable on a bed. Keep large painted areas thin and place raised embellishments away from the center.
Design Ideas for Different Decorating Styles
- Scandinavian: Black arches, simple grids, or irregular dots on an unbleached cotton cover.
- Coastal: Soft blue stripes, coral-inspired branches, or abstract waves on white fabric.
- Bohemian: Warm botanical stamps, imperfect sunbursts, and hand-painted borders.
- Midcentury modern: Mustard, olive, rust, and charcoal geometric shapes.
- Farmhouse: Faded lettering, simple wreaths, or block-printed leaves in muted colors.
- Kids’ rooms: Friendly animals, colorful stars, initials, or washable doodle-style patterns.
- Seasonal décor: Hearts, pumpkins, snowflakes, or spring flowers that can be stored with the cover folded flat.
My Experience Painting IKEA Pillow Covers: What Actually Worked
The first useful lesson from painting IKEA pillow covers was that preparation takes longer than painting, but skipping it makes the painting take forever. On an early test cover, I was eager to start and did not iron the fabric thoroughly. The stencil looked flat enough until paint reached a tiny wrinkle and traveled beneath the edge. One leaf became two leaves connected by what appeared to be a small weather system.
Prewashing and pressing the next cover made a noticeable difference. The cotton surface felt cleaner, the tape adhered more consistently, and the brush moved without catching on creases. I also learned to use a rigid insert instead of a flimsy sheet of paper. Cardboard wrapped in smooth plastic created a better working surface and prevented paint from bonding to the inner panel.
The biggest improvement came from removing paint from the brush rather than adding more. For stencil work, I loaded a foam dauber and then blotted it until it looked almost too dry to be useful. The first layer appeared disappointingly faint, but the second pass produced an even shape with clean edges. When I ignored this method and used a heavily loaded sponge, paint collected around the stencil opening and spread underneath it.
Color planning also mattered more than expected. Four exciting colors in separate bottles can become four competing opinions on one small pillow. The most successful cover used only three shades: a warm neutral, a muted green, and a dark accent. Repeating the darkest color in small amounts tied the composition together without making the pillow look busy.
I found that freehand abstract painting was less stressful than detailed stenciling. Slightly uneven curves looked intentional, and visible brush texture gave the cover more character. The trick was stopping before every empty space had been filled. A little exposed fabric prevented the design from becoming visually heavy.
Waiting for the paint to cure was the least exciting part and one of the most important. A cover can feel dry surprisingly quickly, which creates a dangerous sense of confidence. Folding it too early can cause painted areas to touch, stick, or develop unwanted creases. Leaving the cover flat and untouched for the full curing period produced a smoother, more durable finish.
The first wash was performed inside out in cold water on a gentle cycle. The design survived well because the paint had been applied in thin layers and allowed to cure completely. The fabric around the design remained soft, while the painted portions felt slightly firmer but not uncomfortable.
Another practical discovery involved pillow inserts. A slightly fuller insert made the finished design look smoother and more polished because it pulled minor wrinkles from the front panel. However, an insert that was too large placed unnecessary tension on the zipper and seams. Checking the dimensions before decorating prevented the unpleasant realization that the newly painted cover did not fit the pillow waiting on the couch.
Most importantly, the handmade imperfections became part of the appeal. One stamp was lighter than the others, a painted arch leaned slightly to the left, and a tiny dot appeared where no dot had been planned. None of those details ruined the pillow. They kept it from looking mass-produced, which was the reason for doing the IKEA hack in the first place.
Conclusion
Painting a plain IKEA cushion cover is an affordable way to create custom DIY pillow cases without sewing from scratch or ordering expensive designer textiles. Smooth cotton covers are easy to prepare, fabric paint offers durable color, and techniques such as stenciling, stamping, taping, and freehand brushwork make the project accessible to almost any skill level.
For the best results, prewash the cover without fabric softener, iron it flat, insert a protective barrier, test the paint, and build the design in thin layers. Let the finished cover cure for the full period listed by the manufacturer before washing or adding the pillow insert.
The final pillow does not need perfect lines or flawless repetition. A small variation is evidence that a person made it rather than a machine with suspiciously steady hands. Choose a simple design, limit the color palette, and give yourself permission to experiment. At worst, you will have an interesting practice cover. At best, everyone will ask where you bought your new designer pillow.
Note: Paint formulas differ. Always test the product on scrap fabric and follow its specific instructions for mixing, drying, heat-setting, curing, and washing.