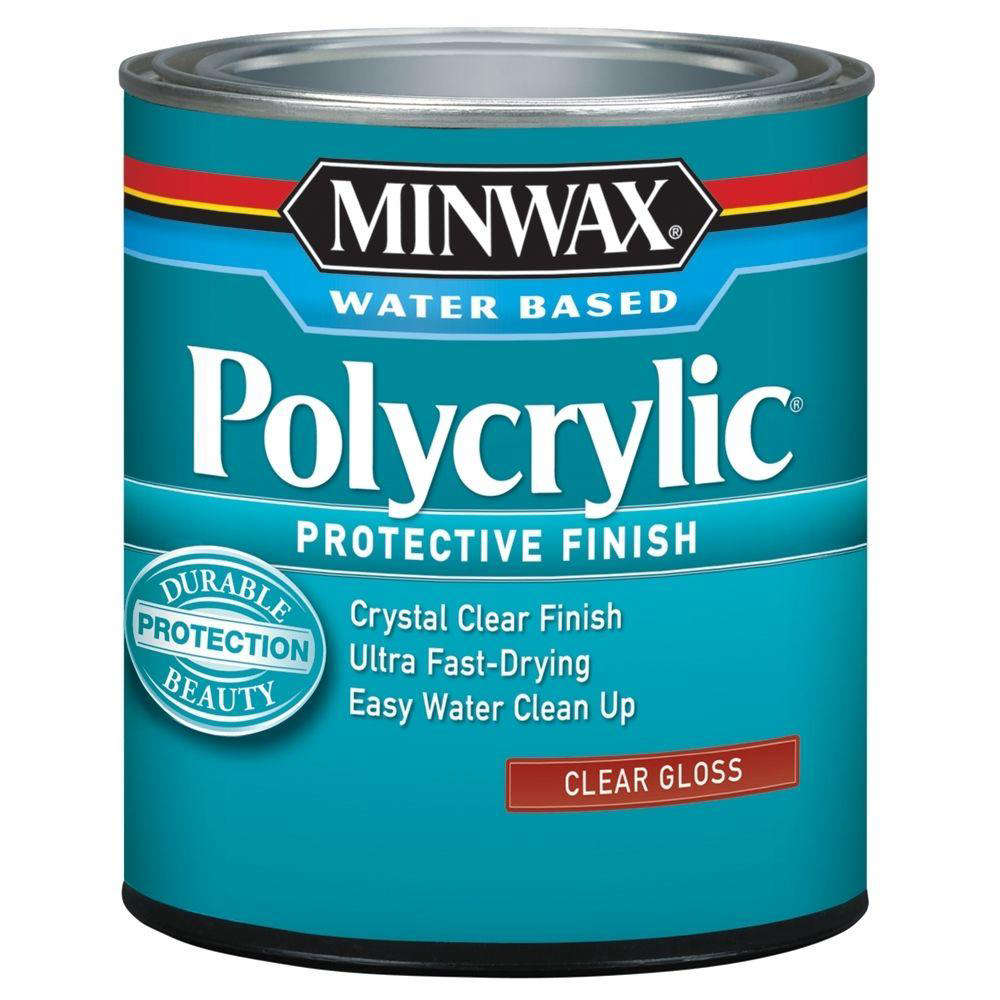

Some DIY products whisper politely from the shelf. Minwax Gloss Polycrylic Protective Finish does not. It practically waves a shiny little flag and says, “Your project could look fabulous, but only if you stop treating the topcoat like an afterthought.”
That is fair. A good clear finish is what turns a carefully sanded shelf, painted cabinet, wood sign, picture frame, or refinished table from “I made this in the garage” into “Wait, you made this?” Minwax Gloss Polycrylic Protective Finish is a water-based protective topcoat designed for interior wood projects. It dries clear, helps protect against everyday scratches and spills, and leaves behind a glossy surface that makes grain, paint color, and decorative details stand out.
Gloss is not shy. It reflects light, highlights beautiful wood grain, and gives cabinets, trim, furniture, and decorative projects a polished look. It also reveals brush marks, dust nibs, and questionable sanding decisions with the enthusiasm of a detective in a crime drama. The good news is that Minwax Gloss Polycrylic can produce a smooth, durable-looking finish when it is applied in thin coats with a little patience.
What Is Minwax Gloss Polycrylic Protective Finish?
Minwax Gloss Polycrylic Protective Finish is a water-based clear coating for interior wood surfaces. It is commonly used over bare wood, stained wood, painted furniture, cabinets, doors, trim, and other decorative pieces that need a protective layer without a warm amber cast.
The product appears milky in the container, which can cause a brief moment of panic for first-time users. Fortunately, that cloudy appearance is normal. Once applied correctly in thin coats, the finish dries crystal clear. This makes it especially useful on lighter woods such as maple, birch, ash, and pine, where an oil-based finish may add a yellowish or amber tone over time.
Gloss Polycrylic is intended for indoor projects. It is not the ideal choice for exterior furniture, decks, porch railings, or surfaces exposed to rain, intense sunlight, and dramatic weather swings. A patio chair has enough problems without being asked to survive ultraviolet rays, summer storms, and one neighborhood squirrel with a grudge.
Why Choose a Gloss Polycrylic Finish?
Choosing a sheen is more than a cosmetic decision. Gloss has a higher level of reflectivity than satin, matte, or flat finishes. That reflective quality can make a finished surface look brighter, cleaner, and more dramatic. It is a strong option for projects where you want wood grain, paint color, or carved details to be noticed.
Benefits of Minwax Gloss Polycrylic
- Clear appearance: The water-based formula is designed to dry clear rather than adding a strong amber tone.
- Fast recoating: Under suitable conditions, additional coats can be applied after about two hours.
- Easy cleanup: Brushes and small spills can be cleaned with soap and warm water while the product is still wet.
- Low odor compared with many oil-based finishes: This can make it more comfortable for indoor DIY projects, although ventilation is still important.
- Useful on light woods: It helps preserve the natural color of maple, ash, birch, and similar species.
- Glossy visual impact: It can create a polished, furniture-like shine on shelves, cabinets, doors, trim, signs, and decorative pieces.
The phrase “water-based finish” sometimes makes people assume “weak finish.” That is not quite right. Polycrylic can offer practical protection for many household items, especially projects with light to moderate use. Still, it is not the heavyweight champion for every job. A heavily used dining table, kitchen island, hardwood floor, or outdoor bench may require a finish built specifically for greater abrasion, heat, moisture, or UV resistance.
Best Projects for Minwax Gloss Polycrylic
Minwax Gloss Polycrylic Protective Finish works particularly well when clarity, quick drying, and indoor convenience matter more than industrial-grade toughness. It is a natural fit for smaller woodworking and furniture-refresh projects where the finish can be applied efficiently before it begins to set.
Great Uses for Gloss Polycrylic
- Wood picture frames
- Floating shelves
- Interior doors and trim
- Cabinet doors
- Stained wood signs
- Painted side tables
- Bookcases and display shelves
- Decorative wooden boxes
- Craft furniture and built-ins
- Light-use desks and end tables
Gloss Polycrylic is also popular for painted furniture because it adds a durable clear barrier without changing the paint color much. That matters when you have spent three hours achieving the perfect dusty blue, warm white, or “vintage farmhouse mushroom cloud beige” paint color and would prefer not to watch it turn yellow.
When Polycrylic Is Not the Best Choice
A good finishing decision begins with honesty. Minwax Gloss Polycrylic is useful, but it is not a magical force field in a can. It should not be your first choice for floors, outdoor projects, or surfaces that face frequent heat, standing water, harsh cleaners, or serious daily abuse.
For example, a floor receives shoes, pets, chair legs, dropped toys, moving furniture, and the occasional mysterious sticky spot. That is a demanding job. Minwax recommends using a finish designed for floors in high-traffic areas because Polycrylic may require more frequent recoating there.
Likewise, use caution on very large tabletops or broad vertical surfaces. Because water-based clear coats dry quickly, it can be harder to keep a wet edge across a large area. If you stop halfway through a tabletop to answer a text message, make coffee, or question your life choices, you may return to a visible lap mark.
How to Prepare Wood for a Smooth Gloss Finish
Preparation is not glamorous. Nobody posts a viral video of removing sanding dust. Yet preparation is where the final result is won or lost. Gloss finishes are especially unforgiving because reflected light makes every scratch, stray bristle, dip, and dust speck easier to see.
Step 1: Make Sure the Surface Is Clean
The wood should be dry and free of wax, grease, furniture polish, loose old finish, and debris. Wax and polish can interfere with adhesion, while dust can become permanently trapped in the finish. A glossy surface with embedded crumbs may technically be protected, but it will not look especially luxurious.
Step 2: Sand Evenly
Sand bare wood until it feels smooth and uniform. Many projects finish well after sanding through progressively finer grits, often ending around 180 or 220 grit. The goal is not to sand until the wood becomes emotionally exhausted. The goal is to remove scratches, rough fibers, glue residue, and uneven spots without creating waves or rounded edges where you wanted crisp lines.
Always sand in the direction of the wood grain whenever possible. Cross-grain scratches may hide before finishing, then suddenly appear under gloss like they bought front-row tickets.
Step 3: Remove Every Bit of Dust
Vacuum the project carefully, then wipe it with a clean, slightly damp cloth if appropriate. Let the surface dry completely before applying Polycrylic. Avoid steel wool with water-based finishes because small steel fragments can rust and create discoloration. Fine synthetic sanding pads or very fine sandpaper are safer choices between coats.
Step 4: Let Stain Dry Fully
If you are using stain beneath Minwax Gloss Polycrylic, follow the stain manufacturer’s drying instructions. Minwax specifically advises waiting at least 24 hours before applying Polycrylic over Minwax Wood Finish stain. When using any unfamiliar stain, paint, glaze, or decorative treatment, test the complete finishing schedule in an inconspicuous spot or on a scrap piece first.
How to Apply Minwax Gloss Polycrylic Protective Finish
The actual application process is simple, but simple does not mean careless. The best results come from several thin, even coats rather than one heroic coat thick enough to preserve an insect in amber.
1. Stir, Do Not Shake
Stir the finish well before and during use. Do not shake the container. Shaking introduces bubbles, and bubbles are the tiny villains of clear finishing. They may pop, they may not, and they may leave little craters or cloudy marks that you get to sand later.
2. Use a Quality Synthetic-Bristle Brush
For brush application, use a clean, high-quality synthetic-bristle brush. Synthetic bristles work well with water-based coatings and can help lay down a smoother film than a cheap disposable brush. Foam brushes can work for some flat areas, but a quality brush often gives better control around edges, corners, grooves, and details.
Pour a small amount of Polycrylic into a separate clean container rather than repeatedly dipping into the full can. This helps keep dust and dried particles out of the remaining finish.
3. Apply Thin Coats With the Grain
Brush in the direction of the wood grain using long, smooth strokes. Keep the coat thin and even. Do not keep brushing an area after it has started to set. Overbrushing can cause streaks, bubbles, drag marks, and uneven sheen.
Work from one edge to the other while maintaining a wet edge. On a tabletop, complete one manageable section at a time and lightly feather the next section into it. Watch the surface from a low angle under good light so you can spot missed patches, drips, or ridges before the finish begins to dry.
4. Let It Dry, Then Sand Lightly
Allow the first coat to dry for at least two hours under normal conditions. Temperature, humidity, air movement, and coat thickness can change drying time, so test the surface before sanding. If it still feels tacky, give it more time.
Once dry, lightly sand with very fine 220-grit sandpaper or a fine synthetic finishing pad. The purpose is not to sand through the finish. You are simply knocking down raised grain, dust nibs, and tiny imperfections while creating a little tooth for the next coat to grip.
Remove all sanding dust before applying another coat. A vacuum, clean microfiber cloth, or lint-free cloth can help. Avoid rushing this step. A clean surface is much easier to admire than a glossy surface filled with surprise confetti.
5. Apply Three Thin Coats
Three coats are generally recommended for a protective, even finish. Apply the second and third coats using the same thin-coat method. Sand lightly between coats, remove dust, and resist the temptation to flood the surface in pursuit of instant gloss.
After the final coat, allow at least three hours before light handling and about 24 hours before normal use. For heavier use, give the item additional time to harden before placing lamps, books, dishes, or other objects on it. A finish may feel dry before it has developed its best resistance to pressure and scuffing.
How to Avoid Brush Marks, Bubbles, and Cloudiness
Most Polycrylic problems are not mysterious. They usually come from applying too much product, working too slowly, brushing back into partially dry finish, or finishing in unfavorable conditions. Luckily, these problems are usually repairable with patience and fine sanding.
Brush Marks
Brush marks often happen when the finish is too thick, the brush is low quality, or the surface is repeatedly brushed as it starts to dry. Use a full but not overloaded brush, apply a thin coat, and make a few confident passes in the grain direction. Then leave it alone. The finish needs time to level. Hovering over it with a brush will not improve its self-esteem.
Bubbles
Bubbles can come from shaking the can, stirring too aggressively, overbrushing, using a foam brush with too much pressure, or applying a thick coat. Stir slowly. Load the brush gently. Apply with smooth strokes. If bubbles appear and the finish is still wet, a single gentle finishing stroke may help. If it has begun to set, do not touch it. Let it dry, sand it smooth, and apply the next coat more carefully.
Cloudy or Milky Areas
Polycrylic looks milky in the container, but it should dry clear in thin coats. Cloudiness can occur when the coating is applied too heavily, when humidity is high, or when the product is used over an incompatible surface. Thin coats, stable indoor conditions, and a small test area can prevent a great deal of frustration.
Runs and Drips
Gloss finish makes drips especially obvious, particularly on vertical surfaces. Check edges, corners, and undersides a few minutes after application. If you see a fresh drip while the finish is still wet, gently smooth it with the brush. If it has started to tack up, leave it alone and sand it flat after drying.
Tips for a More Professional-Looking Gloss Finish
- Work in a clean area with minimal airborne dust.
- Use angled lighting to reveal brush marks and missed spots.
- Finish early in the day when the workspace is calm and less dusty.
- Keep the project horizontal whenever possible to reduce runs.
- Use thin coats instead of trying to build a glass-like finish in one pass.
- Sand gently between coats and remove every trace of dust.
- Keep pets, fans, and curious children away from freshly coated surfaces.
- Do not apply the finish over red mahogany stain unless you have tested compatibility and followed the manufacturer’s special instructions.
- Do not thin the product unless the manufacturer specifically directs you to do so.
- Store the container away from freezing temperatures and excessive heat.
Minwax Gloss Polycrylic vs. Polyurethane
Polycrylic and polyurethane are both clear protective finishes, but they are not interchangeable in every situation. Polycrylic is water-based, dries quickly, stays clear, and cleans up with soap and water. It is especially attractive for light-colored interior woodwork, cabinets, trim, crafts, and smaller furniture projects.
Polyurethane, especially oil-based polyurethane, is often preferred when maximum durability, stronger heat resistance, or higher moisture resistance is needed. It is commonly used for floors, heavy-use furniture, and surfaces that receive more abuse. Oil-based polyurethane can also add a warmer amber tone, which may be beautiful on some woods and completely unwelcome on others.
Neither product wins every contest. The right choice depends on the project. For a bright maple shelf, a white painted cabinet, or a decorative wood sign, Gloss Polycrylic can be an excellent choice. For a busy family dining table that hosts homework, hot mugs, birthday candles, science experiments, and suspiciously aggressive board-game nights, a tougher finish may be worth considering.
Safety and Cleanup Tips
Even water-based finishes deserve basic safety habits. Work in a well-ventilated space, avoid prolonged skin contact, and follow the label instructions for storage, disposal, and personal protection. Keep the container closed when not in use, and keep it away from children and pets.
Use soap and warm water to clean brushes immediately after application. Do not allow Polycrylic to dry in the brush unless you enjoy turning useful tools into decorative sculptures.
If you are refinishing an older painted surface, especially in a home built before 1978, take lead-paint precautions before sanding. Older paint layers can create hazardous dust when disturbed. Do not casually sand unknown old coatings indoors. Use appropriate containment and lead-safe practices or seek trained help when necessary.
Practical Experiences With Minwax Gloss Polycrylic Protective Finish
People often discover Minwax Gloss Polycrylic Protective Finish after completing the fun part of a project: choosing stain, painting furniture, building shelves, or transforming a thrift-store find into something that no longer looks like it survived three garage sales and a minor flood. The topcoat comes last, which is exactly why it is so often underestimated.
A common experience is using Gloss Polycrylic on a light-colored wood project, such as birch plywood shelves or a maple picture frame. The appeal is immediate: the finish helps preserve the pale, natural look of the wood instead of adding the warmer tint associated with many oil-based finishes. After the first coat, however, the surface can feel slightly rough. This is normal. Water-based finishes can raise tiny wood fibers, especially on bare wood. A gentle sanding after the first coat often transforms the project from “pretty good” to “why does this suddenly feel expensive?”
Another familiar experience involves painted furniture. A DIYer paints an end table, cabinet door, or wooden tray in a color that looked perfect under the store lights. Then comes the understandable fear: will a clear coat turn it yellow? Gloss Polycrylic is popular in these situations because it generally stays clear and adds shine without dramatically changing the paint color. The important lesson is to apply it thinly. Heavy coats on a painted surface can look uneven, collect in corners, or develop a cloudy look before drying.
Many first-time users also learn that gloss is honest. Extremely honest. Satin may quietly forgive a faint sanding scratch or a speck of dust. Gloss will put that same scratch under a spotlight and hand it a microphone. This is not a reason to avoid gloss. It is simply a reason to slow down during preparation. A smooth sanding job, good dust removal, and bright side lighting make a huge difference.
Brush choice is another practical lesson. A low-cost brush can shed bristles, leave uneven coverage, or create ridges that become more obvious as the finish dries. A quality synthetic-bristle brush is a small upgrade that can save considerable sanding later. It also helps to avoid repeatedly brushing the same area. The instinct to “just fix that little spot” is powerful, but with fast-drying Polycrylic, that little spot may turn into a visible patch.
Users also tend to appreciate how quickly they can move through the coat schedule. On a small project, applying a coat, waiting for it to dry, sanding lightly, and recoating can make the work feel efficient rather than endless. Still, fast drying is both friend and troublemaker. On large tabletops, wide doors, or long built-ins, working too slowly can create lap marks. Breaking the project into manageable sections or choosing a finish better suited to larger surfaces can prevent frustration.
The final lesson is that Polycrylic rewards patience more than force. Three thin coats usually look better than one thick coat. Light sanding is better than aggressive sanding. A clean workspace is better than trying to pick dust out of wet finish with the precision of a bomb technician. When treated as a finishing system rather than a final-minute shortcut, Minwax Gloss Polycrylic Protective Finish can give indoor projects a clear, polished, durable-looking surface that makes the effort underneath it feel worthwhile.
Final Thoughts
Minwax Gloss Polycrylic Protective Finish is a practical choice for indoor wood projects that need a clear, bright, glossy protective coat. Its water-based formula, quick recoating time, easy cleanup, and non-ambering appearance make it especially useful for light woods, painted furniture, trim, cabinets, shelves, picture frames, and decorative projects.
The secret to success is not complicated: prepare carefully, stir instead of shaking, apply thin coats, brush with the grain, avoid overworking the surface, sand lightly between coats, and give the finish enough time to dry. Treat gloss like the spotlight-loving finish that it is, and it can make your project look polished rather than merely protected.