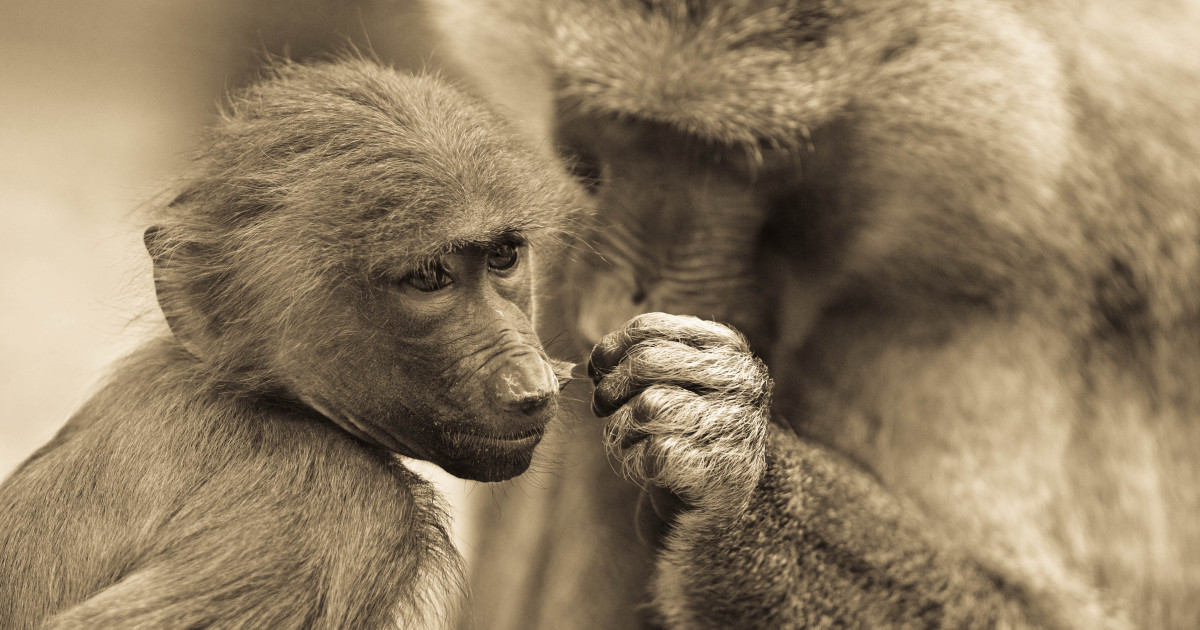

Wildlife photography usually arrives in color with all the confidence of a peacock entering a quiet library. Feathers flash, fur glows, leaves compete for attention, and the sky insists on being part of the conversation. But sometimes, color talks too much. That is when I reach for sepia tones.
Sepia wildlife photography is not simply a brown filter tossed over an animal portrait like a vintage blanket. Done well, it is a storytelling choice. It softens the noise, emphasizes shape and mood, and turns a quick glimpse of a deer, owl, fox, heron, or squirrel with suspiciously judgmental eyes into something that feels timeless. The image begins to look less like a record of what I saw and more like a memory of how it felt.
This article explores my approach to wildlife photography in sepia tones: why sepia works, how to shoot with it in mind, how to edit without making every animal look like it escaped from an antique postcard, and how to practice ethical wildlife photography while still creating images with emotional weight. Because the best wildlife photo is never worth disturbing the wildlife. The animal is the main character; the photographer is just the quiet person trying not to step on a twig.
What Sepia Tones Bring to Wildlife Photography
Sepia has a long photographic history. In traditional darkroom printing, sepia toning was once used to alter the chemistry of black-and-white prints, giving them a warm brown cast and helping improve longevity. Today, most photographers create sepia digitally, but the emotional effect remains similar: warmth, nostalgia, restraint, and a quiet sense of age.
In wildlife photography, sepia works especially well because animals already carry ancient visual language. Antlers, feathers, claws, whiskers, shells, wings, and watchful eyes all feel connected to something older than us. A sepia tone can strip away modern distractions and make a raccoon on a fence look like a tiny masked bandit from a forgotten frontier newspaper. Which, frankly, is probably how raccoons see themselves.
The magic of sepia is that it changes the viewer’s priorities. Instead of asking, “What color was the bird?” the viewer asks, “What was happening?” The eye moves toward gesture, expression, texture, light, and negative space. A sepia image of a hawk is not about the exact shade of its feathers. It is about the curve of the wing, the tension in the talons, and the feeling that the sky briefly grew a spine.
Why Wildlife Looks So Good in Sepia
Wildlife photography often succeeds when it balances realism with emotion. Color is valuable, especially for species identification, environmental context, and natural beauty. But color can also create clutter. A bright green background may compete with a brown rabbit. A blue sky may pull attention away from a flying heron. A busy forest floor may make a fox disappear faster than snacks at a family reunion.
Sepia reduces that competition. It turns the scene into a study of contrast, line, and atmosphere. Fur becomes texture. Feathers become pattern. Water becomes silver-brown movement. Dust becomes drama. Even ordinary branches become part of the design instead of random sticks photobombing the subject.
Sepia Highlights Texture
Wild animals are full of texture: the layered feathers of a barred owl, the rough hide of a bison, the soft winter coat of a deer, the tiny scales on a reptile, the wet shine on a frog after rain. In color, texture sometimes takes second place to hue. In sepia, texture gets promoted to manager.
Sepia Strengthens Mood
A warm monochrome palette can make a scene feel calm, mysterious, reflective, or cinematic. A lone bird on a fence post at sunrise may look pleasant in color, but in sepia it can feel like the opening frame of a story. You do not know where the bird is going, but you are suddenly emotionally invested in its commute.
Sepia Simplifies Busy Environments
Wildlife rarely poses in clean studio conditions. Animals prefer reeds, mud, leaves, shadows, grass, rocks, and other natural obstacles that seem carefully designed to ruin autofocus. Sepia helps unify those elements. It does not erase clutter, but it can make the background feel more intentional.
Shooting With Sepia in Mind
The best sepia wildlife image begins before editing. I try to imagine the final photograph while I am still in the field. Since sepia reduces color information, I pay closer attention to light direction, contrast, silhouette, background separation, and the animal’s posture.
Look for Strong Light, Not Just Pretty Color
Golden hour is famous for warm color, but it is also valuable because of its angle. Early morning and late afternoon light creates shape. It skims across fur and feathers, catches eyes, and gives the subject dimension. For sepia photography, that direction matters more than the original color temperature.
Midday light can be harsh, but it is not always useless. In color, noon sun can flatten a scene or create unpleasant contrast. In sepia, strong light and shadow can become graphic and dramatic if handled carefully. A backlit egret, a squirrel on a roofline, or a lizard on a sunlit rock may turn into a bold monochrome composition.
Choose Backgrounds That Convert Well
When I plan to edit in sepia, I look for backgrounds with tonal separation. A brown deer in front of brown grass can become a brown-on-brown mystery puzzle. A deer in front of pale fog, dark trees, or snow-dusted brush has a better chance of standing out.
The same principle applies to birds. A dark bird against a dark branch may lose impact unless there is rim light, catchlight, or a clean outline. A pale bird against dark water can become striking in sepia because the subject and background naturally separate.
Use the Right Lens for Distance and Respect
A longer lens is more than a creative tool; it is an ethical one. Wildlife should not have to pay rent in stress just because I want a tighter portrait. Telephoto lenses allow me to photograph animals from a safe, respectful distance while preserving natural behavior.
If an animal changes its behavior because of me, I am too close. If it stops feeding, freezes, turns away repeatedly, vocalizes in alarm, guards young, or looks ready to leave, I back up. A good photograph feels wonderful for a moment. A frightened animal may lose valuable energy, safety, or feeding time. That is a terrible trade, and no amount of sepia can make it classy.
Ethical Wildlife Photography Comes First
Wildlife photography has one rule that should sit above every camera setting: the welfare of the subject comes first. The goal is to observe, not interfere. I avoid baiting animals, chasing them, blocking their path, crowding nests or dens, or revealing sensitive locations online. A photograph should never become an invitation for others to overwhelm a fragile habitat.
National parks, refuges, and conservation organizations commonly stress distance, patience, and respect. Many public lands have specific wildlife-distance rules, especially around large mammals and predators. Even where no sign is posted, common sense should be louder than the shutter. If I need to crop later, I crop later. Pixels are replaceable. A stressed animal is not.
Ethical fieldcraft also improves the photograph. Animals that feel safe behave naturally. They groom, hunt, rest, stretch, court, feed, and interact. Those moments are more interesting than a panicked escape shot. Patience is the original autofocus system, though admittedly it does not come with firmware updates.
Composition Tips for Sepia Wildlife Images
Sepia tones reward careful composition. Because the color palette is limited, every line and shape becomes more important. I look for clean edges, expressive posture, strong eyes, and environmental clues that support the story.
Focus on the Eye
In wildlife photography, the eye often carries the emotional connection. A sharp eye can rescue a simple composition. A soft eye can make even a rare animal photo feel unfinished. In sepia, catchlights become especially important because they bring life to the subject’s face.
Use Negative Space
Negative space gives wildlife room to breathe inside the frame. A bird perched on the far left with open sky to the right can suggest movement, waiting, or solitude. A fox small in a wide field can tell a story about habitat instead of just anatomy.
Watch for Silhouettes
Silhouettes convert beautifully to sepia when the outline is recognizable. Antlers, wings, long legs, curved beaks, and upright ears all create strong shapes. The less detail the viewer sees, the more important the shape becomes.
Let Habitat Speak
A tight portrait is powerful, but wildlife does not live in a vacuum. Including reeds, snow, bark, water, grass, or desert dust can make the image more meaningful. Sepia can blend subject and setting into one visual mood, creating a portrait that feels rooted in place.
Editing Wildlife Photos in Sepia Tones
Editing is where sepia either becomes elegant or turns into digital soup. The goal is subtlety. I usually start by converting the image to black and white, adjusting exposure and contrast first, and then applying a warm tone. This helps me judge the photograph by its structure before falling in love with the color effect.
Start With a Strong Black-and-White Base
If the image does not work in black and white, sepia probably will not save it. I check whether the subject separates from the background, whether the highlights are controlled, and whether the shadows hold enough detail. Sepia adds mood, but it does not fix a weak composition. It is seasoning, not a rescue helicopter.
Keep the Tone Warm, Not Muddy
A good sepia tone usually lives somewhere between warm brown, soft bronze, and muted amber. Too much saturation can make the image look artificial. Too little contrast can make it look sleepy. I aim for warmth with depth, preserving true blacks and clean highlights.
Protect Important Detail
Wildlife images often depend on small details: whiskers, feather edges, eye rings, wet noses, claws, or the fine outline of a wing. Heavy toning can flatten those details. I use local adjustments carefully, brightening the eye, adding a touch of texture where needed, and reducing distractions without making the animal look airbrushed.
Avoid Over-Romanticizing the Scene
Sepia can make almost anything look historic, but wildlife photography still benefits from honesty. I do not want a modern animal portrait to pretend it came from 1892 unless that is the clear artistic concept. The best sepia edits feel natural, not theatrical. The animal should still belong to its environment, not to a dusty museum drawer.
Best Subjects for Sepia Wildlife Photography
Not every wildlife image needs sepia. Some animals depend on color for their visual impact. A painted bunting, monarch butterfly, or wood duck may lose part of its identity in monochrome. But many subjects become stronger when color steps aside.
Birds of Prey
Owls, hawks, eagles, and falcons often look magnificent in sepia because their shapes are bold and their expressions are intense. A perched owl in warm monochrome can feel quiet and ancient, like it knows your passwords and disapproves of them.
Large Mammals
Deer, elk, bison, bears, foxes, coyotes, and wild horses all work beautifully in sepia when the light emphasizes body shape and texture. Dust, fog, snow, or backlight can add atmosphere without relying on color.
Water Birds
Herons, egrets, cranes, ducks, and shorebirds often create elegant silhouettes. Reflections on water convert well to sepia, especially when ripples create soft patterns around the subject.
Small Everyday Wildlife
Some of my favorite sepia images come from ordinary encounters: a squirrel holding a nut like it signed a mortgage on it, a sparrow fluffed in winter, a rabbit paused at the edge of a yard, or a turtle basking with the confidence of a retired professor. Sepia can make familiar animals feel freshly noticed.
Common Mistakes to Avoid
The first mistake is applying the same sepia preset to every photograph. Sepia is not a universal sauce. Each image needs individual attention because light, contrast, subject color, and background tone all affect the final result.
The second mistake is forgetting the story. A technically clean sepia image can still feel empty if nothing is happening. I look for gesture: a turn of the head, a lifted paw, a wing stretch, a glance, a moment of stillness before movement. Wildlife photography is often about the half-second when the animal reveals character.
The third mistake is editing too heavily. If the whites turn orange, the shadows clog, and the animal looks dipped in coffee, the edit has gone too far. Coffee is for the photographer, not the fox.
Field Notes: My Experience With Wildlife Photography In Sepia Tones
My best experiences with sepia wildlife photography have rarely started with dramatic plans. They usually begin with me standing somewhere damp, cold, itchy, or mildly confused, wondering whether the rustling sound nearby is a bird, a squirrel, or my own jacket trying to embarrass me.
One morning, I photographed a heron along a quiet bank just after sunrise. In color, the scene was pretty but ordinary: pale blue water, green reeds, gray feathers. When I converted it to sepia, the image changed completely. The bird’s long neck became the central line of the frame, the reeds turned into soft vertical brushstrokes, and the water looked like old paper. The photograph no longer felt like “a heron I saw.” It felt like a pause in time.
Another time, I watched a deer step out from behind a row of trees. The light was thin and angled, not bright enough for a cheerful color image. At first, I thought the file would be a throwaway. But the deer’s outline was clean, and there was a small catchlight in its eye. In sepia, the image gained a quiet strength. The muted palette made the moment feel private, almost as if the forest had briefly opened a door and then politely closed it again.
Sepia has also taught me to appreciate imperfect weather. Fog, dust, drizzle, and winter haze are not problems; they are atmosphere arriving without charging a styling fee. A fox moving through dry grass can look beautiful in color, but in sepia the grass becomes a soft field of tone, and the fox becomes a shape, a mood, a suggestion of movement. The image feels less documentary and more poetic, while still respecting the truth of the moment.
I have learned that patience matters more than equipment. A long lens helps, a fast shutter helps, and good autofocus is a blessing that deserves snacks. But the real difference often comes from waiting quietly. When I stop chasing the image, the image sometimes walks, flies, hops, or waddles into place. This is especially true with wildlife. Animals do not follow creative direction. A duck will not “give more mystery.” A squirrel will not “turn slightly toward the light.” They have schedules, instincts, and possibly tiny legal departments.
Editing these images later is a second act of observation. I notice things I missed in the field: the curve of a feather, the tension in a paw, the way a branch frames an eye, the pattern of rain on water. Sepia encourages me to slow down and ask what the photograph is really about. Is it about the animal’s beauty? Its alertness? Its solitude? Its place in the landscape? Once I know the answer, the edit becomes clearer.
The biggest lesson is that sepia wildlife photography is not about making nature look old. It is about making attention feel deeper. It asks the viewer to linger. It removes the loudest parts of the scene so the quiet parts can speak. In a world where images are often consumed in a blink, that feels valuable. Wildlife already moves at its own rhythm. Sepia helps me meet it there.
Conclusion
My wildlife photography in sepia tones is a way of seeing beyond color. It is about patience, restraint, atmosphere, and respect. Sepia can turn a simple animal portrait into a timeless study of light and form, but only when the original moment has honesty behind it.
The strongest sepia wildlife images begin with ethical field behavior: keeping distance, protecting habitat, avoiding disturbance, and letting animals remain wild. From there, the craft becomes a dance between light, composition, timing, and careful editing. A good sepia photograph should not shout, “Look at this filter!” It should whisper, “Stay here a little longer.”
Whether photographing a hawk at sunrise, a deer in fog, a heron in shallow water, or a backyard squirrel acting like the mayor of the fence, sepia tones can reveal the quiet drama already present in nature. The trick is not to force nostalgia onto the scene. The trick is to recognize when the scene already has a memory inside it.
Note: This article is written as original, publish-ready web content and synthesizes established wildlife photography, conservation ethics, camera technique, and sepia editing principles without source links or citation artifacts.