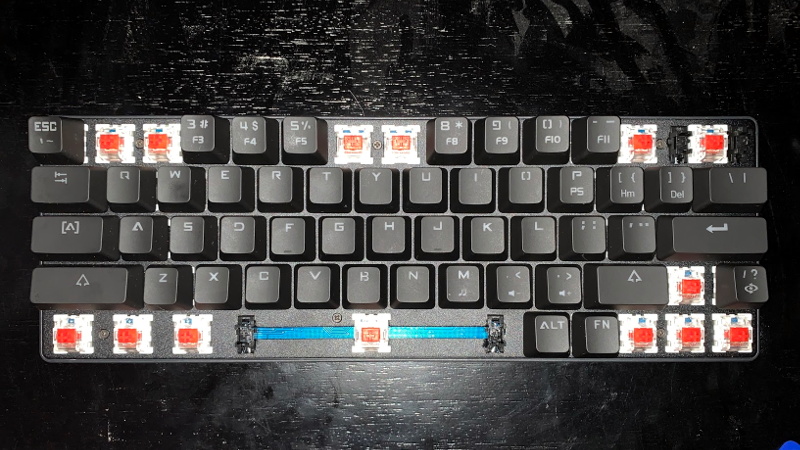

Cheap mechanical keyboards are everywhere now. You can find them on Amazon, eBay, AliExpress, office desks, gaming setups, dorm rooms, and probably one forgotten drawer where the RGB is still glowing out of pure stubbornness. They often come with hot-swappable switches, colorful backlighting, and enough marketing buzzwords to make a spaceship blush. But many of them share one annoying weakness: the firmware is locked down, limited, strange, or controlled by software that looks like it was translated by a toaster.
That is where QMK comes in. QMK, short for Quantum Mechanical Keyboard firmware, is an open-source firmware ecosystem that gives keyboard users deep control over how their board behaves. Instead of being stuck with a basic function layer and a questionable “gaming mode,” you can build layers, macros, tap-dance keys, custom shortcuts, rotary encoder behavior, RGB logic, mouse keys, and layout tricks that make your keyboard feel less like a mass-produced rectangle and more like a tool designed for your hands.
Porting QMK to a cheap mechanical keyboard means replacing or adapting the keyboard’s original firmware so the board can run QMK. It is part electronics detective work, part firmware development, part patience exercise, and part “why did I start this at midnight?” energy. Done correctly, it can turn an inexpensive keyboard into a surprisingly powerful custom device. Done carelessly, it can turn that same keyboard into a decorative plastic waffle. Let’s walk through what the process involves, why it matters, and what you should know before grabbing a screwdriver.
What Does “Porting QMK” Actually Mean?
Porting QMK is not the same as installing a keyboard app, loading a VIA JSON file, or changing keycaps to something that looks like it belongs on a submarine control panel. A real QMK port means creating a keyboard definition inside QMK firmware so the software understands the hardware. That includes the microcontroller, the row and column pins, the matrix size, the physical layout, diode direction, bootloader type, enabled features, and default keymap.
In a typical QMK keyboard folder, files such as info.json, rules.mk, config.h, and keymap.c describe how the keyboard is wired and how it should behave. Modern QMK development increasingly favors data-driven configuration, meaning more board information can live in JSON rather than scattered C header files. This makes the firmware easier to maintain, easier to validate, and friendlier to tools such as QMK Configurator.
For a cheap keyboard, the big challenge is that the manufacturer may not publish schematics, firmware source code, pinouts, or even an accurate microcontroller name. You may open the case and find a mystery chip, a matrix that does not match any obvious layout, and LEDs wired in a way that suggests the PCB designer was paid by the curveball. That does not make the project impossible. It simply means you need to reverse-engineer enough of the hardware to describe it to QMK.
Why Bother Porting QMK To A Budget Board?
The main reason is control. Cheap mechanical keyboards can feel excellent mechanically but disappointing digitally. The switches may be smooth, the case may be solid, and the keycaps may be acceptable after you forgive their font crimes. But if the firmware only allows a few preset lighting modes and no serious remapping, the board is trapped below its potential.
QMK changes that. With a successful port, you can build custom layers for programming, gaming, editing, writing, CAD, music production, or anything else that benefits from faster input. You can make Caps Lock act as Escape when tapped and Control when held. You can create a navigation layer with arrows under your home row. You can add macros for repetitive work, system shortcuts, media keys, Unicode input, or application-specific commands. You can even create a layout so personalized that nobody else can use your keyboard without looking mildly betrayed.
There is also a sustainability argument. A cheap keyboard with bad firmware does not have to become e-waste. If the PCB, switches, stabilizers, and case are usable, replacing the firmware can extend the life of the hardware. Instead of buying another board because the software is terrible, you can make the board better. That is the kind of nerdy thriftiness that deserves a tiny parade.
Step 1: Identify The Keyboard’s Microcontroller
The microcontroller is the brain of the keyboard. Before you can port QMK, you need to know whether QMK can run on that chip or whether the project will require a controller replacement. Open the keyboard carefully, photograph the PCB, and look for markings on the main chip. Common QMK-friendly families include certain AVR chips such as ATmega32U4, many STM32 ARM microcontrollers, RP2040-based controllers, and other supported platforms. Some low-cost boards also use Sonix SN32 chips, which have been the focus of community QMK porting efforts through SonixQMK.
This is where cheap keyboards become unpredictable. Two boards with the same product name may contain different chips across revisions. One batch may use a flashable MCU, while another uses a locked or unsupported controller. Even worse, some vendors advertise “QMK/VIA” in a loose way that does not always mean the board is fully supported in the official QMK repository. Always inspect the actual hardware, not just the product page.
If the chip is supported and has a usable bootloader, you are in a good position. If it is unsupported but well-documented, you may still have a long-term porting project. If it is locked, obscure, or integrated into a design that resists flashing, the easier route may be replacing the controller with a known QMK-compatible board such as a Pro Micro, Elite-C, RP2040 controller, or custom daughterboard. That is not failure. That is just firmware diplomacy with a soldering iron.
Step 2: Back Up The Original Firmware If Possible
Before flashing anything, preserve the stock firmware if there is a realistic way to do it. Some keyboard communities strongly recommend keeping a copy of the original firmware before experimenting, especially with Sonix-based boards. This gives you a chance to recover the keyboard if your QMK build fails, behaves strangely, or forgets that the letter “A” exists.
Backing up firmware depends on the microcontroller and bootloader. Some chips allow reading flash memory; others lock it. Some vendor update tools contain firmware files that can be extracted, while others hide everything behind a cheerful progress bar. The key idea is simple: do not destroy your only known-working firmware unless you are comfortable with the board becoming a science project.
At this stage, document everything. Take photos of the PCB, chip markings, USB connector area, reset pads, boot pins, LED drivers, and switch matrix traces. Write down the original behavior of special keys, lighting shortcuts, and function-layer combinations. Future you will thank present you. Future you is tired.
Step 3: Reverse-Engineer The Keyboard Matrix
Most keyboards use a matrix. Instead of wiring every key directly to its own microcontroller pin, the keyboard arranges switches across rows and columns. The firmware scans this matrix to detect which keys are pressed. QMK needs to know the row pins, column pins, matrix dimensions, diode direction, and which physical key belongs to each matrix position.
To reverse-engineer the matrix, you can use a multimeter in continuity mode, PCB trace inspection, datasheets, and careful testing. Start by identifying which pins on the microcontroller connect to rows and columns. Then map each switch to a row-column coordinate. A spreadsheet helps. So does coffee. So does not trusting your first measurement, because one wrong coordinate can make your semicolon key behave like Backspace, which is funny exactly once.
Diode direction matters because it tells QMK how current flows through the matrix. Common settings include COL2ROW and ROW2COL. If the diode direction is wrong, keys may not register correctly, or ghosting behavior may appear. Many keyboards place diodes near each switch, but some budget boards have unusual routing or shared components, so inspect carefully.
Step 4: Create A New QMK Keyboard Folder
Once you know the hardware basics, you can create a new keyboard target. QMK provides tools for creating a new keyboard structure, and the typical folder path looks like keyboards/vendor/model. Inside that folder, the keyboard definition describes the board’s identity and hardware configuration.
A simplified info.json may include the keyboard name, manufacturer, USB vendor ID, product ID, matrix pins, diode direction, processor, bootloader, and layout macro. The layout section maps physical keys to matrix positions. This is important because QMK separates physical layout from key assignments. The physical key at top-left might be matrix row 0, column 0, but the keycode assigned to it could be Escape, Grave, or something deeply cursed like Play/Pause.
The default keymap usually lives in keymaps/default/keymap.c. At first, keep it boring. Use a simple ANSI-style layout if the board is ANSI. Make every key easy to test. Do not begin by adding five layers, home-row mods, tap dances, combos, and RGB fireworks. That is like testing a bicycle by attaching a jet engine. First confirm that every switch works. Then get fancy.
Step 5: Compile Before You Flash
Compiling the firmware is the first reality check. Use the QMK CLI to build the target and watch for errors. Common early problems include missing matrix definitions, incorrect layout names, invalid JSON, unsupported pin names, wrong MCU settings, or feature conflicts that exceed available flash memory.
Budget keyboards often use microcontrollers with limited storage. QMK features are powerful, but they are not free. VIA support, RGB Matrix, OLED, audio, mouse keys, combos, tap dance, and large keymaps can consume memory quickly. If the firmware does not fit, disable features you do not need. Your keyboard does not need to run a nightclub, a calculator, and a tiny operating system on day one.
When the build succeeds, save the generated firmware file and label it clearly. Include the keyboard model, keymap, date, and bootloader type in your notes. Good file names prevent panic later. “firmware_final_REAL_final_2.bin” is not a system. It is a cry for help.
Step 6: Flash Carefully
Flashing is where the firmware moves from your computer onto the keyboard. The exact process depends on the bootloader. AVR boards may use tools such as avrdude. STM32 boards may use DFU workflows. RP2040 boards often use UF2 files copied to a bootloader drive. Some Sonix boards require specific community tools and boot pin procedures. QMK Toolbox and the QMK CLI can simplify many workflows, but you still need to know what bootloader your board uses.
Before flashing, confirm that you have selected the correct firmware for the correct keyboard. Flashing the wrong file can break USB detection or make the board behave unpredictably. Also make sure the board is connected directly to your computer rather than through a flaky hub. A failed flash caused by a bad cable is the keyboard hobby’s version of stepping on a rake.
After flashing, test the keyboard immediately with a keyboard tester or plain text editor. Confirm every key registers once, in the correct position, with no stuck rows, missing columns, or swapped modifiers. If a whole row fails, suspect a row pin. If a whole column fails, suspect a column pin. If random keys appear together, suspect diode direction or matrix mapping. Debugging is easier when you test systematically rather than pressing keys angrily like you are trying to summon customer support.
Step 7: Add Layers, Macros, And Useful QMK Features
Once the basic port works, the fun begins. QMK layers let one physical key perform different actions depending on the active layer. A compact keyboard can gain arrow keys, function keys, media controls, number pads, symbols, and application shortcuts without growing extra plastic limbs.
Popular upgrades include a function layer for F1-F12, a navigation layer with arrows and Home/End/Page Up/Page Down, a media layer for volume and playback, and a programming layer for brackets, symbols, and shortcuts. Writers may want em dash shortcuts, smart navigation, or window-management commands. Gamers may want a clean base layer with accidental Windows-key prevention. Developers may want brackets, pipes, underscores, and terminal shortcuts within easy reach.
QMK also supports more advanced behavior. Tap Dance can make one key do different things based on tap count. Combos can trigger actions when multiple keys are pressed together. Mod-Tap can make a key behave as a normal key when tapped and a modifier when held. Macros can automate repeated sequences. These features are powerful, but use them thoughtfully. A keyboard should feel faster, not like a riddle box designed by a wizard with deadlines.
Step 8: Consider VIA Or Vial Support
VIA allows users to change keymaps through a graphical interface without reflashing firmware every time. For many people, this is the difference between “cool open-source firmware” and “I can actually use this without living in a terminal.” To support VIA, the keyboard typically needs VIA-enabled QMK firmware and a compatible keyboard definition JSON. The VIA definition must match the firmware’s matrix and layout information.
Adding VIA support is not just flipping a magic switch, although it can sometimes feel close once the QMK port is stable. The firmware must include the correct options, and the layout definition must be accurate. If the keyboard is not in the official VIA database, users may need to sideload the definition manually. This is common for experimental ports and community-maintained budget boards.
Vial is another popular option in the keyboard community, offering a different approach to dynamic keymap editing. However, as with VIA, it is best to create a reliable default QMK keymap first. A stable base port makes every later feature easier. Build the house before installing the disco lights.
Common Problems When Porting QMK To A Cheap Keyboard
The MCU Is Not Supported
This is the classic wall. If QMK does not support the microcontroller and no community fork exists, you may need to replace the controller or choose another keyboard. Some chips are technically capable but lack open tooling, documentation, or bootloader access.
The Matrix Map Is Wrong
If keys are swapped, missing, or firing in groups, revisit the row-column mapping. A single incorrect matrix coordinate can create confusing symptoms. Use a methodical test pattern and update the layout gradually.
The Firmware Is Too Large
Disable features you do not need. RGB effects, VIA, mouse keys, combos, and tap dance can add up. Start small, then add features one at a time.
The Keyboard Will Not Enter Bootloader Mode
Some boards require a reset button, boot pin short, key combination, or vendor-specific tool. If the bootloader is locked or overwritten, recovery may require hardware flashing tools.
RGB Does Not Work
RGB on budget boards can be complicated. Some use addressable LEDs, some use matrix LED drivers, and some use custom circuits. Get the key matrix working first. RGB is dessert, not dinner.
Specific Example: A 60% Budget RGB Keyboard
Imagine a cheap 60% mechanical keyboard with hot-swap sockets, per-key RGB, and a vendor app that only runs on Windows. The case is decent, the switches are acceptable, and the stabilizers sound like they have unresolved emotional issues. You open it and find a Sonix-family MCU, a row-column matrix, and a PCB similar to other low-cost boards that the community has already explored.
The porting path would begin by checking whether the exact MCU and board revision are already supported by a community project such as SonixQMK. If a similar board exists, compare the matrix pins, LED configuration, and bootloader process. If no exact match exists, map the matrix manually. Create a new QMK keyboard folder, define the matrix pins and layout, build a default keymap, and flash cautiously using the correct bootloader process.
At first, you may ignore RGB entirely. Confirm that all keys work. Then add function layers. Then test VIA support if memory allows. Finally, investigate lighting. By moving in stages, you reduce the number of mysteries. Debugging one mystery is engineering. Debugging six mysteries at once is performance art.
Is Porting QMK Worth It?
Porting QMK to a cheap mechanical keyboard is worth it if you enjoy learning, tinkering, and accepting some risk. It is not always worth it if your only goal is to get a working programmable keyboard quickly. In that case, buying a keyboard with official QMK/VIA support may be cheaper than spending a weekend arguing with a microcontroller whose datasheet appears to have been assembled from smoke signals.
However, for hobbyists, the process is deeply rewarding. You learn how keyboard matrices work, how firmware describes hardware, how bootloaders behave, and how open-source communities keep devices alive long after manufacturers move on. You also gain a new appreciation for well-documented keyboards. Documentation is not glamorous, but when you are staring at unlabeled test pads at 1:12 a.m., good documentation feels like a warm blanket.
Extra Experience: What It Feels Like To Port QMK To A Cheap Mechanical Keyboard
The first experience most people have with this project is optimism. The keyboard looks simple. It is just switches in rows, right? How hard can it be? Then the case opens, the PCB appears, and suddenly you are reading chip markings with a flashlight like an archaeologist trying to decode an ancient snack wrapper. This is the moment when the project becomes real.
The most useful habit is to slow down. Cheap keyboards invite assumptions because they often resemble other boards. The plate may match another model. The case may be reused. The PCB may look familiar. But one changed pinout or one revised controller can ruin a copied configuration. Treat every board as its own specimen until proven otherwise. Take photos before removing screws. Label ribbon cables. Note which side of the PCB is up. Keep screws in a cup, not loose on the desk, unless you enjoy hearing one roll into another dimension.
Matrix mapping is usually the most educational part. It teaches you that a keyboard is not a magical grid of letters. It is an electrical scanning system. When you press a key, you are closing a circuit between a row and a column. QMK does not care that the keycap says “G.” QMK cares that row 2, column 5 changed state, and your layout tells it that this position should send KC_G. Once that idea clicks, keyboard firmware becomes much less mysterious.
Expect mistakes. A row may be reversed. A column may be mislabeled. The bottom row may contain weird spacing. The function key may not exist electrically where you expect it. On compact boards, especially 60% and 65% layouts, manufacturers sometimes route keys in ways that make sense for PCB efficiency but not for human intuition. Do not take it personally. The PCB is not insulting you. It is merely indifferent.
The first successful compile feels good. The first successful flash feels even better. The first time every key registers correctly feels like winning a tiny engineering championship. After that, customization becomes addictive. You add a layer for arrows. Then one for media. Then a macro for screenshots. Then a shortcut for your editor. Then you start wondering whether Space should also be Shift when held. This is how normal people become keyboard people. There is no known cure, but there are very nice keycaps.
The biggest lesson is that a cheap keyboard can be more than its price tag. Under the plastic shell, it may be a perfectly usable platform for learning embedded development, USB HID behavior, open-source firmware, and hardware debugging. Even when the port fails, the experience is valuable. You learn what to check before buying the next board, what MCU families are friendly, why bootloader access matters, and why community documentation can save hours of frustration.
Porting QMK is not just about making a keyboard type letters. The original firmware already did that. It is about ownership. It is about taking a generic device and teaching it your workflow. It is about replacing “this is what the manufacturer allows” with “this is what I want my tool to do.” For a cheap mechanical keyboard, that transformation is surprisingly satisfying. The board may have started life as a budget rectangle with rainbow lights, but with QMK, it can become a genuinely personal input device.
Conclusion
Porting QMK to a cheap mechanical keyboard is not the easiest keyboard project, but it is one of the most interesting. It combines hardware inspection, matrix mapping, firmware configuration, compiling, flashing, and testing into one practical challenge. The payoff is a keyboard that can support smarter layers, useful macros, better shortcuts, and a workflow designed around you instead of around whatever the factory firmware happened to include.
If you want a quick win, buy a board with official QMK/VIA support. If you want a learning adventure, a budget keyboard can be a fantastic playground. Just back up what you can, document everything, start with a simple keymap, and remember: RGB can wait. The first goal is getting every key to type the right thing. The glowing rainbow victory lap comes later.
Note: Firmware flashing always carries some risk. Before attempting a QMK port, verify your exact keyboard revision, preserve the stock firmware when possible, and be prepared for recovery work if the board stops responding.