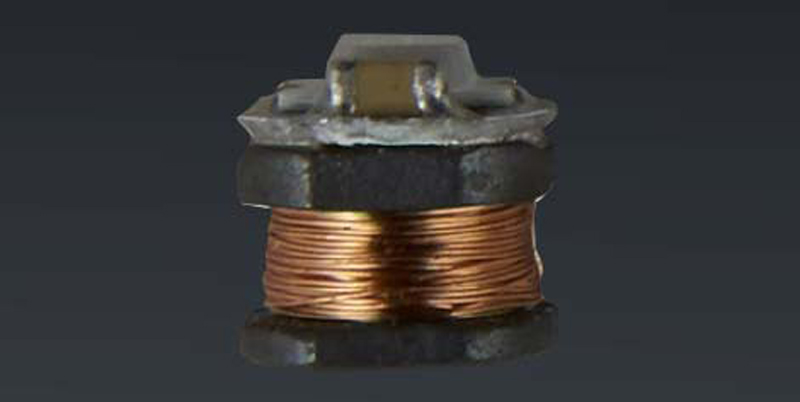

Wireless LEDs sound like the sort of thing a magician would pull from a velvet pouch right after borrowing your watch and “forgetting” to return it. Tiny lights glowing with no visible battery, no wires, and no obvious trick? That is exactly the kind of electronics project that makes people lean over the table and ask, “Wait… how is that even on?”
The good news is that wireless LEDs are not magic. The better news is that they are not new, either, which means makers, model builders, cosplay tinkerers, tabletop gamers, and electronics beginners can learn from years of real-world experiments. From wireless phone chargers to inductive display stands, the basic idea is simple: use electromagnetic induction to transfer energy through a short air gap, then let a tiny coil and LED convert that energy into light.
The result is a project that feels futuristic but can be built with surprisingly ordinary parts: magnet wire, LEDs, a transmitter coil, and a low-voltage power source. If you have ever wanted a spaceship model with glowing engines, a fantasy miniature with a glowing staff, a LEGO-compatible brick that lights up without a battery, or a desk ornament that looks like it escaped from a science museum gift shop, wireless LEDs are a fantastic rabbit hole.
What Are Wireless LEDs?
Wireless LEDs are light-emitting diodes that receive power without a direct wired connection to the main power supply. Most hobby versions use inductive coupling, the same broad principle behind many wireless charging pads. A powered transmitter coil creates a changing magnetic field. A nearby receiver coil picks up some of that field and converts it into electrical energy. Attach an LED to that receiving coil, and the LED lights up when it gets close enough to the transmitter.
That is the short version. The slightly nerdier version is that an alternating current in one coil creates a changing magnetic field, and that changing field induces a voltage in another nearby coil. The two coils do not have to touch. They just need to be close enough, aligned well enough, and designed well enough for useful power transfer. Your LED does not care that the electricity arrived by invisible magnetic handshake. It only cares that current flows in the right direction with enough voltage to glow.
For small decorative LEDs, the power requirement is tiny. That is why wireless LEDs are such a satisfying project: the payoff is visual, immediate, and forgiving. You are not trying to charge a laptop, run a blender, or power a heroic but suspiciously smoky robot arm. You are lighting a small diode, which is much more beginner-friendly.
Wireless LEDs Aren’t New, and That’s Part of the Fun
The phrase “wireless LEDs” may sound like a fresh trend, but the idea has been floating around maker culture for years. Hobbyists have used inductive power for model displays, jewelry, prop lighting, science demonstrations, and tiny decorative circuits. Before modern maker kits became easy to buy, people experimented with phone-signal sticker LEDs, novelty fingernail lights, and coils that harvested nearby electromagnetic energy. Some were clever. Some were questionable. Some looked like they came free with a 2003 flip phone and a questionable ringtone subscription.
Today, the technology is much easier to approach. Wireless charging standards such as Qi made inductive power familiar to everyday consumers. Electronics suppliers now sell small inductive LED kits. Maker educators have published projects for glowing miniatures, tabletop models, maracas, holiday decorations, and display stands. That means you can either buy a kit and start quickly or wind your own receiver coils for a more custom build.
The real appeal is not that wireless LEDs are brand-new. It is that they are finally accessible. What once felt like a physics-lab demonstration can now live inside a model car headlight, a sci-fi diorama, a game piece, or a handmade gift.
How Wireless LED Power Works
The Transmitter Coil
The transmitter coil is the powered side of the system. It is usually a flat spiral or loop of wire driven by an electronic circuit that produces a changing magnetic field. In a commercial wireless charger, the transmitter electronics are designed to communicate with compatible devices and manage power safely. In hobby LED kits, the transmitter is often simpler and meant for low-power lighting experiments.
For a DIY project, the transmitter can be a premade inductive power module, a small wireless LED driver board, or in some cases a wireless charging pad used only with appropriate receiver parts. Beginners should avoid building high-power transmitters from scratch. Low-voltage modules are safer, easier, and far less likely to turn your workbench into a tiny drama series called “Why Is That Smell Happening?”
The Receiver Coil
The receiver coil is the tiny loop attached to the LED. It sits near the transmitter coil and captures a small amount of energy from the magnetic field. Receiver coils can be machine-wound, hand-wound, embroidered into fabric, hidden in a model base, or shaped to fit inside props and miniature structures.
Hand-winding a coil is part science, part craft, and part “why did I choose wire this thin?” Magnet wire works well because it is insulated with a thin coating, allowing many turns in a compact shape. More turns can increase the induced voltage, but the coil size, wire resistance, distance from the transmitter, LED type, and alignment all matter. That is why experimentation is not just expected; it is the entire sport.
The LED
The LED is the star of the show, even though it is usually the cheapest part. Standard 3mm or 5mm LEDs work for simple experiments, while tiny surface-mount LEDs are excellent for miniatures because they create a smaller point of light. Warm white LEDs can mimic lamps or candles. Cool white can suggest sci-fi panels. Red and blue can make a miniature control room look like something has gone either very right or very wrong.
Polarity may matter depending on the circuit design and whether rectification is included. Some simple demonstrations connect an LED directly to a coil and rely on the alternating induced voltage to make it blink or glow. More refined versions use rectifiers, capacitors, or driver circuits to smooth the output and protect components.
Why Makers Love Wireless LEDs
Wireless LEDs solve a problem that model builders know too well: wires are annoying when you want something to look clean. Batteries are also annoying when they die inside a sealed prop, under a display base, or inside a miniature dragon’s left nostril. Wireless LEDs let the power source stay outside the object while the light appears inside it.
For tabletop gaming, that means miniatures can glow while sitting on a powered display base. For scale models, headlights, engines, cockpit panels, and building windows can light up without visible cable runs. For cosplay props, removable parts can illuminate when placed near a hidden coil. For educational projects, wireless LEDs make electromagnetic induction visible in a way that a textbook diagram never quite manages.
They also encourage modular design. Instead of wiring every object permanently, you can create a powered base and several independent glowing pieces. Place the object on the base, and it lights up. Remove it, and it turns off. It feels elegant, because the interaction is physical and intuitive.
Can You Make Your Own Wireless LED?
Yes, and the easiest route is to start small. A beginner-friendly wireless LED project usually includes a low-voltage transmitter coil module and one or more receiver LEDs. You can buy a kit, then reverse-engineer the idea by making your own receiver coils. Once you understand how coil size and placement affect brightness, you can customize the project for models, crafts, and display pieces.
Basic Materials
- Low-voltage inductive transmitter module or wireless LED kit
- Magnet wire for receiver coils
- Small LEDs, such as 3mm, 5mm, or surface-mount LEDs
- Soldering iron and solder
- Tweezers, tape, or a coil-winding jig
- USB power bank, regulated 5V supply, or the power supply recommended for your kit
- Optional: heat-shrink tubing, clear resin, 3D-printed parts, or model bases
The simplest receiver is a small coil connected to an LED. Wind the coil, scrape or burnish the enamel off the wire ends, solder the LED, and test it above the transmitter. If it glows, congratulations: you have successfully convinced invisible magnetism to do a party trick.
Simple Build Concept
Start by winding a receiver coil around a marker, dowel, or small round object. Ten to twenty turns is a common beginner range, but the ideal number depends on the transmitter and LED. Leave enough wire at both ends so you can solder comfortably. Remove insulation from the wire tips, solder the LED leads to the coil ends, and place the coil near the powered transmitter.
If the LED does not light, do not panic. Move it closer. Flip the coil. Change the angle. Try more turns. Try a different LED. Make sure the enamel is actually removed from the wire ends. Magnet wire is sneaky; it can look bare while still wearing its invisible little raincoat.
Design Ideas for Wireless LED Projects
Glowing Model Cars and Aircraft
Wireless LEDs are perfect for scale model headlights, taillights, runway lights, cockpit lighting, and engine glow. A powered base can hide the transmitter coil, while receiver coils sit inside the model. This keeps the model removable and avoids a visible cable that ruins the illusion.
Tabletop Miniatures
Imagine a wizard whose staff glows only when placed on a special base, or a sci-fi soldier standing on a powered terrain tile with a glowing visor. Small surface-mount LEDs can be hidden inside translucent resin, clear plastic, or carefully drilled model parts. The effect can be subtle or gloriously over-the-top, depending on your relationship with restraint.
LEGO-Compatible Builds
Wireless LEDs are especially fun in brick builds because bricks are modular by nature. A receiver coil can be hidden inside a custom brick, under a tile, or inside a display element. The transmitter can live beneath the baseplate. Place the build in the right spot, and the light comes alive without wires running through the whole structure.
Wearables and Soft Circuits
Inductive LEDs can also work in fabric projects. A receiver coil can be stitched, embroidered, or hidden inside a patch. For safety and comfort, wearable versions should stay low-power and avoid heat buildup. They are best for decorative accents rather than anything that needs bright, continuous illumination.
Common Problems and How to Fix Them
The LED Is Too Dim
Dim light usually means weak coupling, poor alignment, too much distance, or a receiver coil that is not well matched to the transmitter. Move the coil closer to the transmitter, center it more carefully, or try changing the receiver coil diameter. A larger coil can capture more field, but only if it fits the transmitter’s field pattern.
The LED Flickers
Some flicker is normal in extremely simple circuits, especially when the LED is powered directly from an induced alternating voltage. Adding a rectifier and smoothing capacitor can help in more advanced builds. For decorative projects, flicker may even be desirable. Nothing says “ancient magical artifact” like a tiny LED having a dramatic emotional moment.
The Coil Gets Warm
Warmth means energy is being lost as heat. A little warmth may be normal, but hot components are a warning sign. Reduce power, check for short circuits, use the recommended supply, and avoid placing metal objects near the transmitter coil. Do not leave experimental coils running unattended.
The LED Only Works in One Tiny Spot
That is a coupling and alignment issue. Wireless power is not a room-filling force field; it works best over short distances with good coil placement. A better base design, a larger transmitter coil, or a carefully positioned receiver can make the usable area more forgiving.
Safety Tips for DIY Wireless LEDs
Wireless LED projects should stay in the low-voltage hobby zone. Use regulated supplies, follow the rating of your kit or module, and avoid modifying mains-powered chargers. Do not place coins, tools, foil, or random metal pieces on active transmitter coils, because metal can heat up. Keep experiments away from sensitive electronics, magnetic cards, and medical implants unless you have professional guidance.
Also, respect heat. Tiny projects can still get warm if the coil is poorly designed or the transmitter is overdriven. Test in short sessions, check temperature with your fingers carefully, and unplug the system when you are done. The goal is glowing LEDs, not surprise toaster behavior.
Wireless LEDs vs. Battery LEDs
Battery LEDs are simple and portable. They are great when the object must glow anywhere. Wireless LEDs are better when the object can sit near a powered surface and you want to avoid replacing batteries. Neither is universally better; each belongs to a different design situation.
Use batteries for costumes, moving props, and standalone decorations. Use wireless LEDs for display bases, miniatures, removable modules, educational demonstrations, and objects that benefit from a clean, battery-free look. If you need both portability and no visible wires, you may combine approaches: a rechargeable battery inside the object with inductive charging built into the stand.
Why This Project Is Great for Beginners
Wireless LEDs teach several important electronics concepts without requiring a huge parts list. You learn about coils, induction, polarity, soldering, alignment, power transfer, resistance, and troubleshooting. Better still, you get visible feedback immediately. When the LED lights up, the lesson sticks.
It is also a project with room to grow. A beginner can light one LED with a hand-wound coil. An intermediate maker can hide coils in models and design custom display bases. An advanced builder can explore resonant circuits, rectification, current limiting, thermal management, and tuned coil geometry. The same core idea scales from “look, it glows!” to “I accidentally built a tiny museum exhibit.”
Real-World Experience: What It Feels Like to Build Your Own Wireless LEDs
The first time you build a wireless LED, the experience is usually half science experiment and half desk comedy. You wind a tiny coil, solder an LED that suddenly appears to have the legs of a nervous mosquito, place it near the transmitter, and nothing happens. Then you move it a few millimeters, flip it over, tilt it slightly, and suddenly it lights. At that moment, you become unreasonably proud of a component that costs less than a snack.
One of the most useful lessons is that placement matters more than beginners expect. A receiver coil may work beautifully in the center of the transmitter but barely glow near the edge. It may shine brightly when flat and fade when vertical. This can be frustrating until you realize it is also a design tool. For a miniature lamp, you can hide the coil flat in the base. For a glowing sword, you may need a different coil shape or a powered stand that supports the model at the right angle.
Another practical lesson is that smaller is not always easier. Tiny surface-mount LEDs look amazing in final projects, but they require patience, tweezers, and the emotional stability of someone defusing a glitter bomb. Start with larger LEDs, prove the concept, and then shrink the parts once the circuit works. Prototyping with big, ugly parts is not failure. It is how elegant tiny things are born.
Coil winding also teaches humility. The first coil may look like a bird attempted calligraphy. That is fine. The LED does not judge your coil’s beauty; it judges electrical behavior. Still, cleaner coils tend to be more predictable. A simple jig, such as a dowel, marker, 3D-printed form, or two nails in a scrap board, can improve consistency. Once you find a coil size that works, make several identical versions and label them. Future-you will appreciate this small act of kindness.
In display projects, the base is often more important than the LED. A well-designed base hides the transmitter, positions the object reliably, manages cable routing, and prevents people from dropping metal objects onto the active coil. A shallow recess, alignment marks, magnets used carefully outside the coil area, or a shaped platform can make the project feel polished instead of fussy.
Finally, wireless LEDs reward playful experimentation. Try translucent plastic, frosted resin, fiber optics, painted diffusion layers, or tiny light pipes. One LED can become a glowing window, engine plume, crystal, dashboard, campfire, lantern, or alien power core. The electronics are simple, but the creative possibilities are enormous. That is the best kind of maker project: approachable enough to start tonight, flexible enough to keep improving for months, and just mysterious enough to make visitors ask how it works.
Conclusion
Wireless LEDs are not a first, but that is exactly why you should make your own. The idea has been tested by hobbyists, educators, electronics companies, and makers who wanted cleaner models, brighter displays, and fewer annoying wires. By using inductive power, a tiny receiver coil, and a simple LED, you can create lights that appear to glow from nowhere.
For beginners, this project is a friendly introduction to electromagnetic induction. For experienced makers, it is a gateway to better props, smarter display bases, and cleaner miniature lighting. Whether you buy a kit or wind your own coils, the best part is the moment the LED flickers to life and everyone nearby briefly believes you have learned wizardry. You have not. You have learned physics, which is basically wizardry with better documentation.
Note: This article is written for educational, low-voltage hobby projects. Use regulated power supplies, follow component ratings, avoid modifying mains-powered devices, and test experimental builds under supervision.