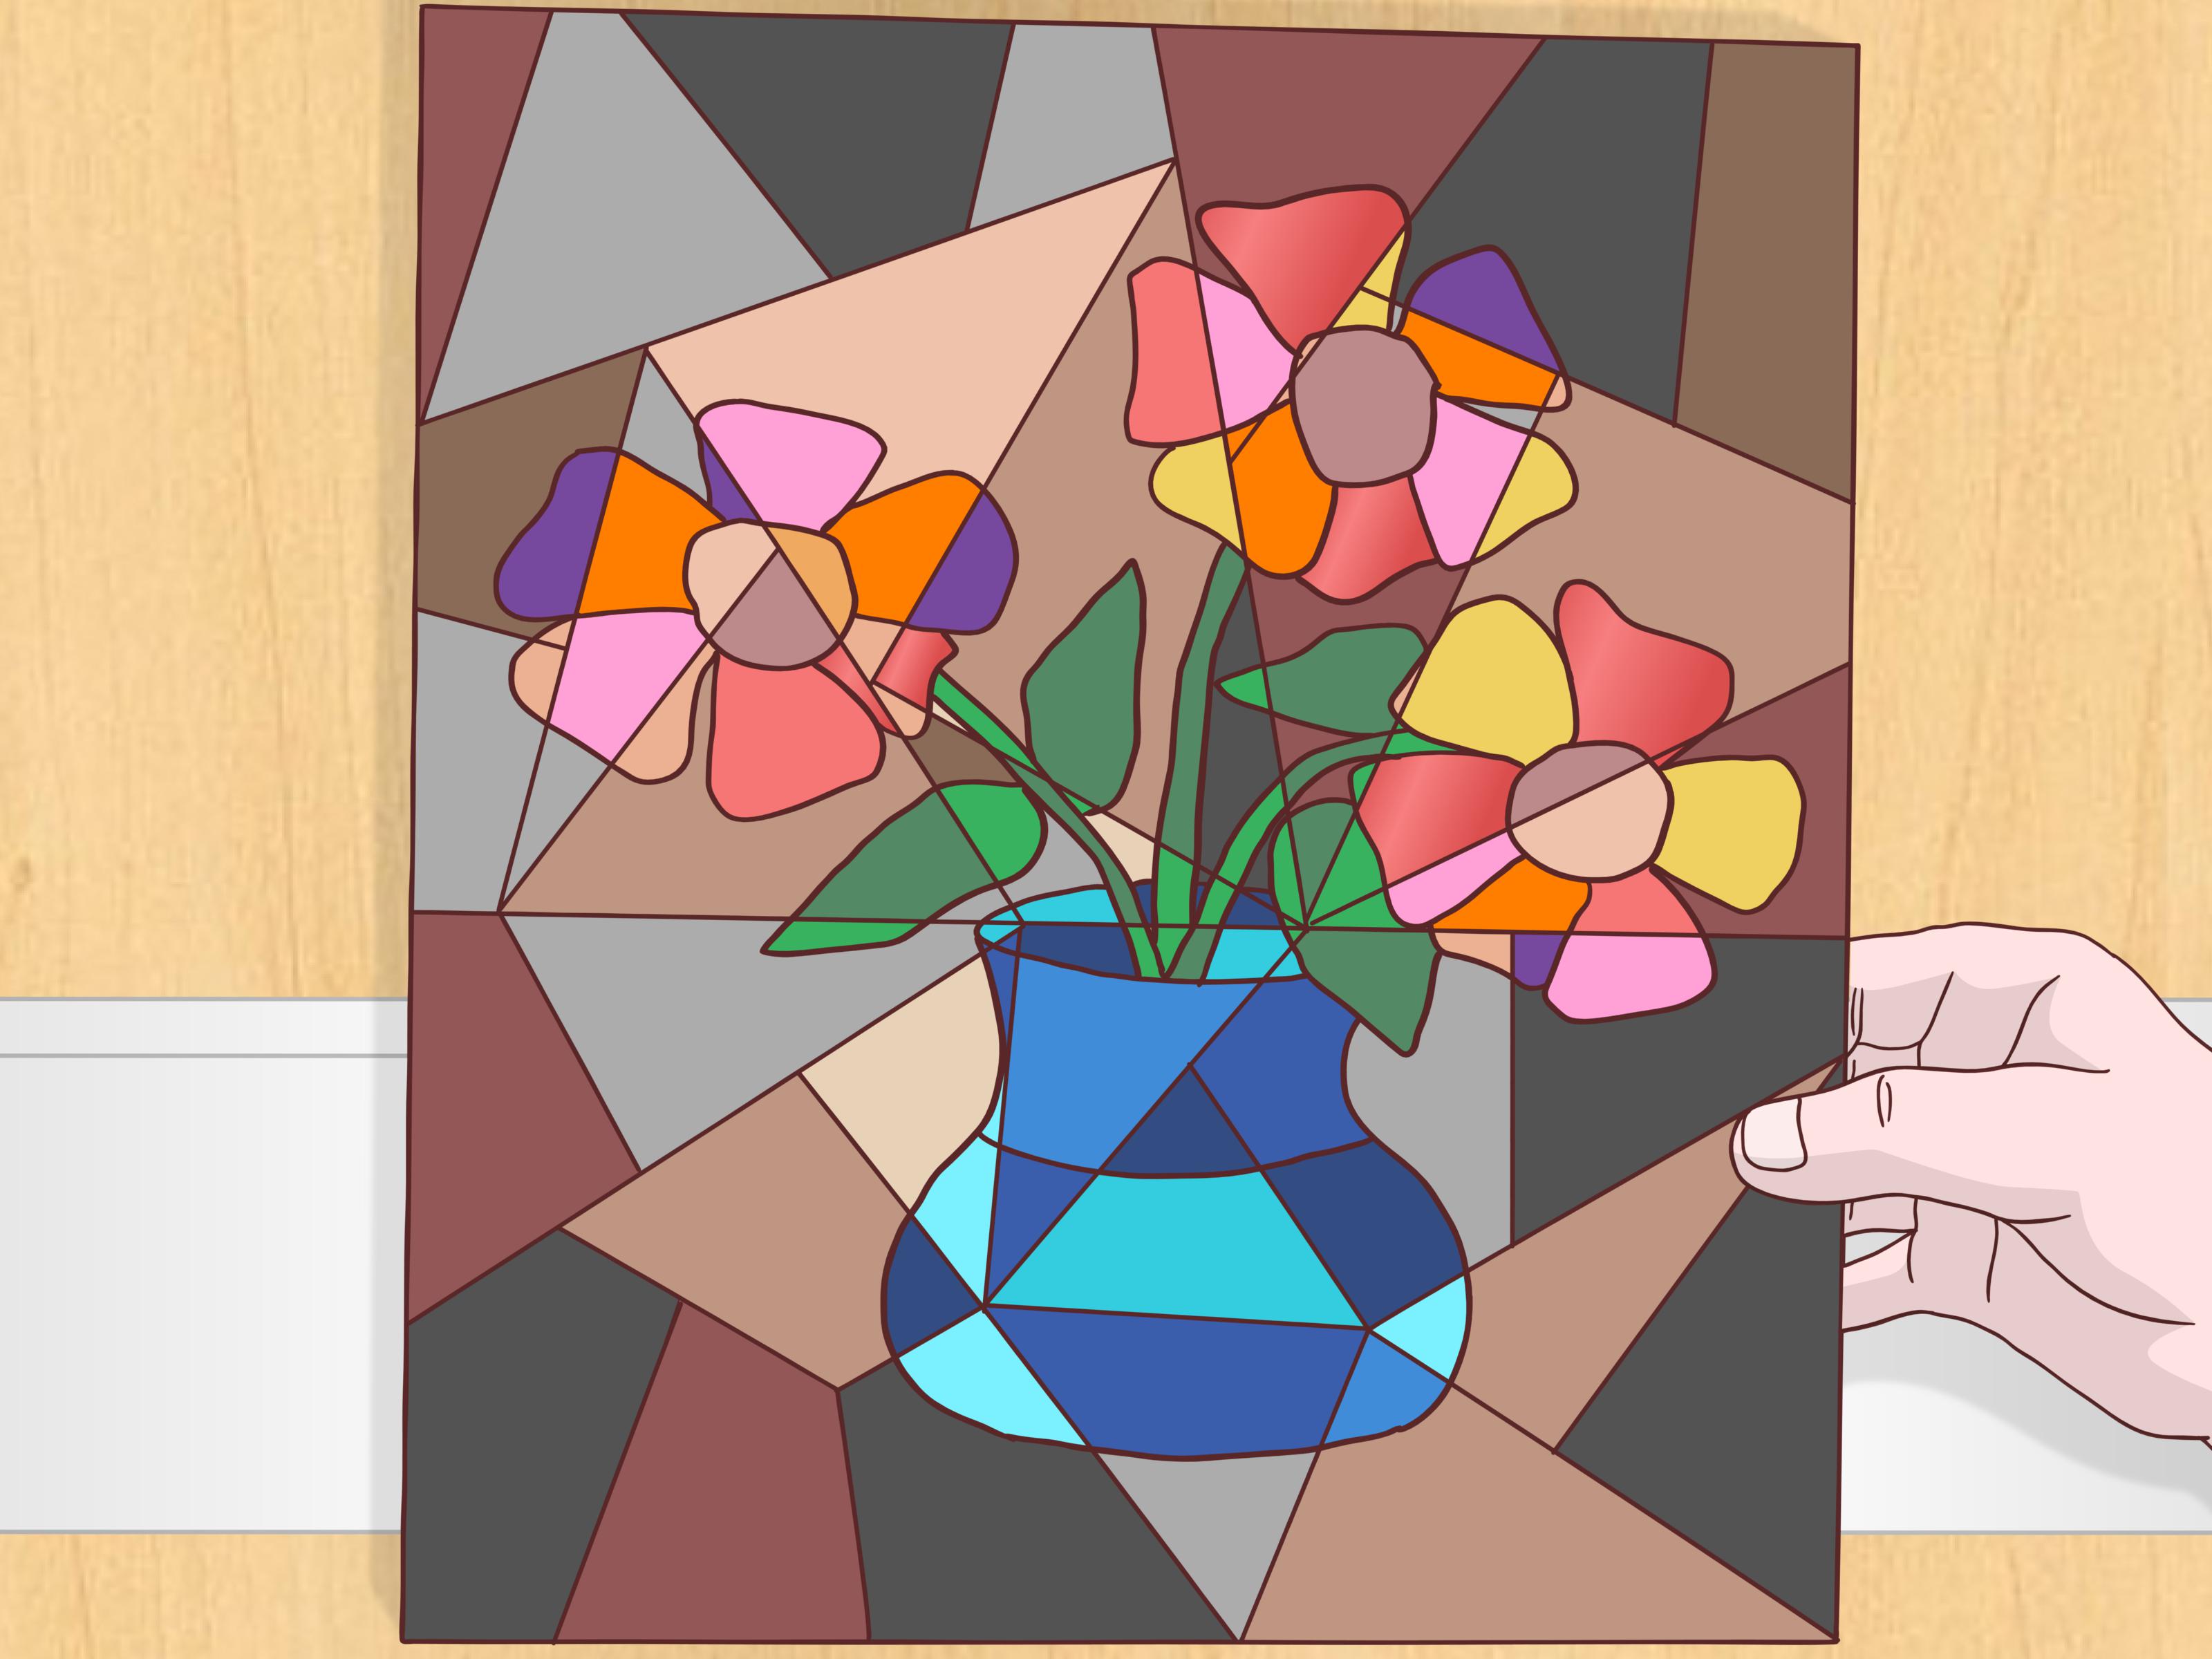

Learning how to do a Cubist style painting is a little like learning to see with superhero vision. Instead of looking at one side of a person, guitar, coffee mug, or bowl of fruit, you look at several sides at once and put them all on the same canvas. Is it realistic? Not exactly. Is it fascinating? Absolutely. Cubism takes ordinary subjects and turns them into fractured, geometric, brain-tickling compositions that look as if reality politely stepped into a kaleidoscope.
Cubism became one of the most influential modern art movements of the early 20th century, largely through the work of Pablo Picasso and Georges Braque. Rather than copying nature with smooth shading and traditional perspective, Cubist artists broke forms into planes, angles, lines, and overlapping viewpoints. The result was art that asked viewers to think, not just look. A Cubist painting says, “Here is the front, side, top, and emotional confusion of this objectall at once.”
The good news is that you do not need to be Picasso, Braque, or a mysterious genius in a striped shirt to try it. With a clear subject, a few drawing tools, a strong composition, and a willingness to bend reality like a pool noodle, you can create your own Cubist style painting. This guide walks you through 14 practical steps, from choosing a subject to adding the final details.
What Is a Cubist Style Painting?
A Cubist style painting is an artwork that breaks a subject into geometric shapes and shows it from multiple viewpoints at the same time. Instead of using one fixed perspective, Cubism combines different angles, flattened space, fragmented forms, and simplified color. The goal is not to make a perfect copy of what the eye sees. The goal is to explore structure, movement, and perception.
There are two major Cubist approaches worth knowing before you begin. Analytical Cubism usually uses muted colors such as brown, gray, black, tan, and ocher. It breaks objects into many small planes, creating a complex, almost puzzle-like image. Synthetic Cubism is often brighter and simpler. It may include collage, printed paper, patterns, letters, or bolder shapes. If Analytical Cubism is a complicated detective novel, Synthetic Cubism is the same story told with jazz hands and newspaper clippings.
Materials You Will Need
You can create a Cubist painting with simple art supplies. A canvas or thick mixed-media paper works well. You will also need pencils, erasers, a ruler, acrylic paint or gouache, brushes, a palette, water, paper towels, and optional collage materials such as newspaper, scrapbook paper, old book pages, or textured packaging. Black marker, charcoal, or a fine liner can help define shapes at the end.
Acrylic paint is especially beginner-friendly because it dries quickly, layers well, and forgives small mistakes. Oil paint can also work, but it requires more drying time and patience. If you are new to painting, acrylic is the friend who shows up on time and brings snacks.
How to Do a Cubist Style Painting: 14 Steps
1. Choose a Simple Subject
Start with a subject that has clear shapes. Good beginner choices include a face, guitar, vase, coffee cup, fruit bowl, chair, plant, or city skyline. Cubism works beautifully with objects that have recognizable parts. A guitar has curves, strings, a neck, and a sound hole. A face has eyes, nose, mouth, profile, and front view. A still life has overlapping forms that are easy to rearrange.
Avoid choosing a subject that is too detailed at first, such as a crowded street scene or a fluffy dog with 11,000 hairs. You can paint those later, after your Cubist confidence has put on a cape.
2. Study the Subject from Different Angles
Look at your subject from the front, side, above, and slightly below. If you are painting a portrait, sketch the face straight on, then sketch the profile. If you are painting a cup, notice the oval rim from above and the rectangle-like body from the side. Cubism is built on multiple viewpoints, so do not settle for one angle.
Take quick reference photos or make small thumbnail sketches. These do not need to be perfect. Their job is to collect visual information, not win a museum prize before lunch.
3. Decide Between Analytical and Synthetic Cubism
Before drawing on your final surface, choose the mood of your painting. If you want a serious, fragmented, subtle look, lean toward Analytical Cubism. Use a limited color palette and many angular planes. If you want something lively, graphic, and playful, lean toward Synthetic Cubism. Use brighter colors, stronger outlines, larger shapes, and possible collage elements.
You can also combine both styles. Many modern Cubist-inspired paintings borrow the structure of Analytical Cubism and the boldness of Synthetic Cubism. Art history will not send a referee to your studio.
4. Sketch the Basic Outline Lightly
Use a pencil to draw a simple outline of your subject. Keep it loose. For a Cubist portrait, sketch the head shape, neck, shoulders, eyes, nose, and mouth. For a still life, place the main objects on the page. Do not worry about accuracy yet. This first sketch is only a skeleton.
Keep your lines light because you will soon break the subject apart. Think of this step as politely introducing your subject before you rearrange its furniture.
5. Break the Subject into Geometric Shapes
Now begin dividing the subject into triangles, rectangles, trapezoids, circles, cones, cylinders, and irregular polygons. A cheek can become a triangle. A forehead can become a slanted rectangle. A bottle can become a cylinder split into flat planes. Cubist art often reduces natural forms into geometry to reveal their structure.
Use straight lines confidently. Draw diagonal lines through the subject and background. Let shapes overlap and intersect. This creates energy and movement. If your drawing starts to look like a stained-glass window designed by a mathematician after two espressos, you are on the right track.
6. Add Multiple Viewpoints
This is where the painting becomes truly Cubist. Combine different angles in one image. In a portrait, show one eye from the front and the nose from the side. In a guitar painting, show the front of the body, the side curve, and the top view of the sound hole. In a still life, tilt the tabletop upward so the viewer can see objects from above and from the side at the same time.
The trick is to make the subject recognizable while also fractured. Do not simply scramble the image randomly. Use multiple viewpoints with intention so the viewer can still say, “Ah, that is a face,” rather than, “Is that a haunted toaster?”
7. Flatten the Space
Traditional painting often creates depth with perspective, shadows, and realistic proportions. Cubism challenges that. Flatten the space by reducing the difference between foreground and background. Let background shapes interact with the subject. Use overlapping planes rather than deep perspective.
For example, if you are painting a vase on a table, do not create a realistic room behind it. Instead, divide the background into angular sections that echo the shapes of the vase. The subject and space should feel connected, almost woven together.
8. Plan Your Composition
A strong Cubist painting still needs good composition. Decide where the main focus should be. Place important shapes away from the exact center for more visual interest. Use diagonals to guide the eye. Balance large shapes with small shapes, dark areas with light areas, and busy sections with calmer sections.
If the whole painting is equally chaotic, the viewer’s eye may panic and ask for a refund. Give the composition a rhythm. Some areas can be highly fragmented, while others can be simpler and more open.
9. Choose a Color Palette
Your color palette can dramatically change the feeling of your Cubist style painting. For an Analytical Cubist look, choose muted earth tones: gray, brown, cream, black, ocher, and olive. These colors emphasize structure and form. For a Synthetic Cubist look, try brighter colors such as red, blue, yellow, orange, green, and violet, balanced with neutrals.
A limited palette often works best. Pick three to five main colors and repeat them throughout the painting. This keeps the artwork unified, even when the shapes are fragmented. Cubism may break reality apart, but your color palette should still know where it parked the car.
10. Paint the Large Shapes First
Begin painting the biggest areas with flat color. Use a medium brush and avoid tiny details at this stage. Fill the major geometric planes one at a time. You can vary the color slightly within related shapes to create interest. For instance, use warm tan on one plane, cool gray on another, and dark brown on a third.
Do not overblend. Cubist painting usually favors clear shapes and defined planes over soft realism. Let brushstrokes remain visible if they add texture. The goal is not to make everything smooth; the goal is to build an organized visual puzzle.
11. Create Contrast with Light and Dark Values
Value means how light or dark a color is. Strong value contrast helps your Cubist painting stay readable. If every shape has the same brightness, the subject may disappear into decorative confusion. Add dark shapes near light shapes to create structure. Use shadows as flat planes rather than realistic gradients.
For a portrait, one side of the face might include dark blue and brown planes, while another side uses cream and yellow. For a still life, the table could include alternating light and dark triangles. This gives the painting depth without traditional perspective.
12. Add Lines, Patterns, and Texture
Once the main colors are dry, add lines to define important edges. You can use a small brush, charcoal, marker, or dark paint. Lines can be black, brown, navy, or any color that fits your palette. Add patterns such as stripes, dots, crosshatching, checkerboards, or wood grain.
Texture can make the painting more engaging. In Synthetic Cubism, artists often used collage materials like newspaper, wallpaper, or printed letters. You can glue pieces of paper into selected shapes and paint around them. A newspaper strip can become part of a guitar, table, jacket, or background. Just do not glue your grocery receipt in the exact spot where it says you bought six bags of chips. Some mysteries are best left unexplored.
13. Refine the Focal Point
Step back from the painting and ask, “Where does my eye go first?” If the answer is “straight to the weird blob in the corner,” you may need to adjust. Strengthen your focal point with sharper lines, brighter color, stronger contrast, or more detail. Reduce attention in less important areas by softening edges or using quieter colors.
For a Cubist portrait, the focal point might be the eyes or the intersection of front and profile views. For a guitar, it might be the sound hole and strings. For a cityscape, it might be the tallest building or a cluster of windows.
14. Finish, Sign, and Evaluate
When the painting feels complete, let it dry and review it with fresh eyes. Ask whether the subject is recognizable, whether the shapes feel balanced, and whether the color palette supports the mood. Add final highlights, dark accents, or small details if needed. Then sign your work.
Do not judge your first Cubist painting by whether it looks like a masterpiece. Judge it by whether you experimented with geometry, multiple viewpoints, flattened space, and expressive composition. Cubism rewards curiosity. Even the awkward parts can teach you something useful.
Practical Example: A Cubist Portrait
Imagine you want to paint a Cubist portrait of a musician. Start with a simple head-and-shoulders outline. Draw one half of the face from the front and the other half in profile. Place one eye looking forward and another eye angled sideways. Break the hair into sharp triangular sections. Turn the guitar into a collection of curves, rectangles, and circles. Tilt the background into diagonal planes that suggest sound, rhythm, and stage light.
Use warm browns, golds, deep blues, and cream for an Analytical-inspired mood. Or use red, teal, yellow, and black for a more Synthetic-inspired style. Add thin black lines for guitar strings, small rectangles for sheet music, and perhaps a collage scrap that looks like a concert poster. The final piece does not need realistic anatomy. It needs visual rhythm, structure, and personality.
Common Mistakes to Avoid
Making the Painting Too Random
Cubism is not just “draw a bunch of triangles and hope for applause.” Each shape should relate to the subject. Fragment the object, but keep its identity alive.
Using Too Many Colors
A rainbow explosion can be fun, but too many unrelated colors may weaken the composition. Choose a clear palette and repeat colors throughout the painting.
Forgetting the Background
In Cubism, the background is part of the design. Do not leave it empty unless the emptiness is intentional. Break the background into planes that support the main subject.
Overworking the Details
Too many tiny marks can make the painting feel cluttered. Use detail where it matters most and let some shapes breathe.
Tips for Making Your Cubist Painting More Expressive
To make your Cubist painting more expressive, exaggerate the features that define your subject. If you are painting a musician, emphasize rhythm with repeated lines. If you are painting a city, use stacked rectangles and sharp diagonals to suggest movement. If you are painting a self-portrait, show different moods through different angles of the face.
You can also use symbolism. A clock might suggest time, a newspaper might suggest modern life, and a musical instrument might suggest sound and emotion. Cubism often plays with meaning as much as appearance. Your painting can be clever, personal, and slightly mischievous.
Experience Notes: What It Feels Like to Paint in a Cubist Style
Creating a Cubist style painting can feel strange at first, especially if you are used to drawing realistically. Most beginners spend years trying to make objects look “right.” Cubism asks you to make them look interesting instead. That shift can be surprisingly freeing. The moment you realize the nose does not have to sit politely in the center of the face, the entire canvas opens up like a creative playground.
One helpful experience is to start with a subject you know well, such as your own coffee mug, favorite chair, or a family member’s face. Familiar objects are easier to distort because you already understand their structure. When you draw a mug from the front, side, and top, you begin to notice details you normally ignore: the oval rim, the handle’s curve, the shadow inside, the way the base sits on the table. Cubism turns looking into investigation.
Another useful lesson is that mistakes often become part of the style. A crooked line, awkward angle, or unexpected color patch can lead to a better composition. In realistic painting, a misplaced eye might be a disaster. In a Cubist portrait, it might become the most exciting part of the piece. This does not mean anything goes; it means you can respond creatively instead of panicking. Cubism is very forgiving if you keep the design balanced.
When working with students or beginners, the most successful projects often begin with a simple portrait exercise: draw a face from the front, then combine it with a profile view. This instantly teaches multiple viewpoints. The nose can point sideways, the mouth can split into two angles, and the eyes can sit at different heights. At first, everyone laughs because the face looks odd. Then, after color and line are added, the oddness becomes expressive. The painting starts to look intentional, modern, and full of personality.
Color experiments are also memorable. A muted palette creates a thoughtful, museum-like feeling, while bold colors make the painting feel energetic and contemporary. If a painting seems too flat, adding darker values along selected planes can bring it back to life. If it feels too busy, repeating one color in several areas can calm the whole composition. These small decisions teach you that Cubism is not chaos; it is controlled rearrangement.
The biggest experience-based tip is to step back often. Cubist paintings can look confusing up close because you are focused on individual shapes. From a distance, the structure becomes clearer. You may suddenly see that the left side is too heavy, the focal point needs contrast, or the background is stealing attention like a dramatic actor in a tiny role. Step back, adjust, and keep going.
Finally, painting in a Cubist style builds confidence because it proves that art does not have to follow one kind of beauty. A successful Cubist painting can be angular, humorous, fragmented, bold, mysterious, and still deeply appealing. It gives you permission to reinterpret the world instead of simply copying it. That is the real magic of Cubism: it teaches you that seeing is not passive. Seeing is an act of imagination.
Conclusion
Learning how to do a Cubist style painting is about more than drawing geometric shapes. It is about changing the way you see. By choosing a strong subject, studying it from multiple angles, breaking it into planes, flattening the space, and using color with intention, you can create a painting that feels dynamic, modern, and personal.
Cubism may look complicated, but the process becomes manageable when you follow clear steps. Start simple, experiment boldly, and allow the painting to evolve. Whether you create a fractured portrait, a musical still life, or a geometric cityscape, your goal is to show more than one viewpoint at once. Reality has many sides. Cubism simply refuses to pick only one.
Note: This article synthesizes established art-history concepts and practical painting methods from reputable museum, education, and art-reference resources. It is written as original, publication-ready content without source links or citation placeholders.