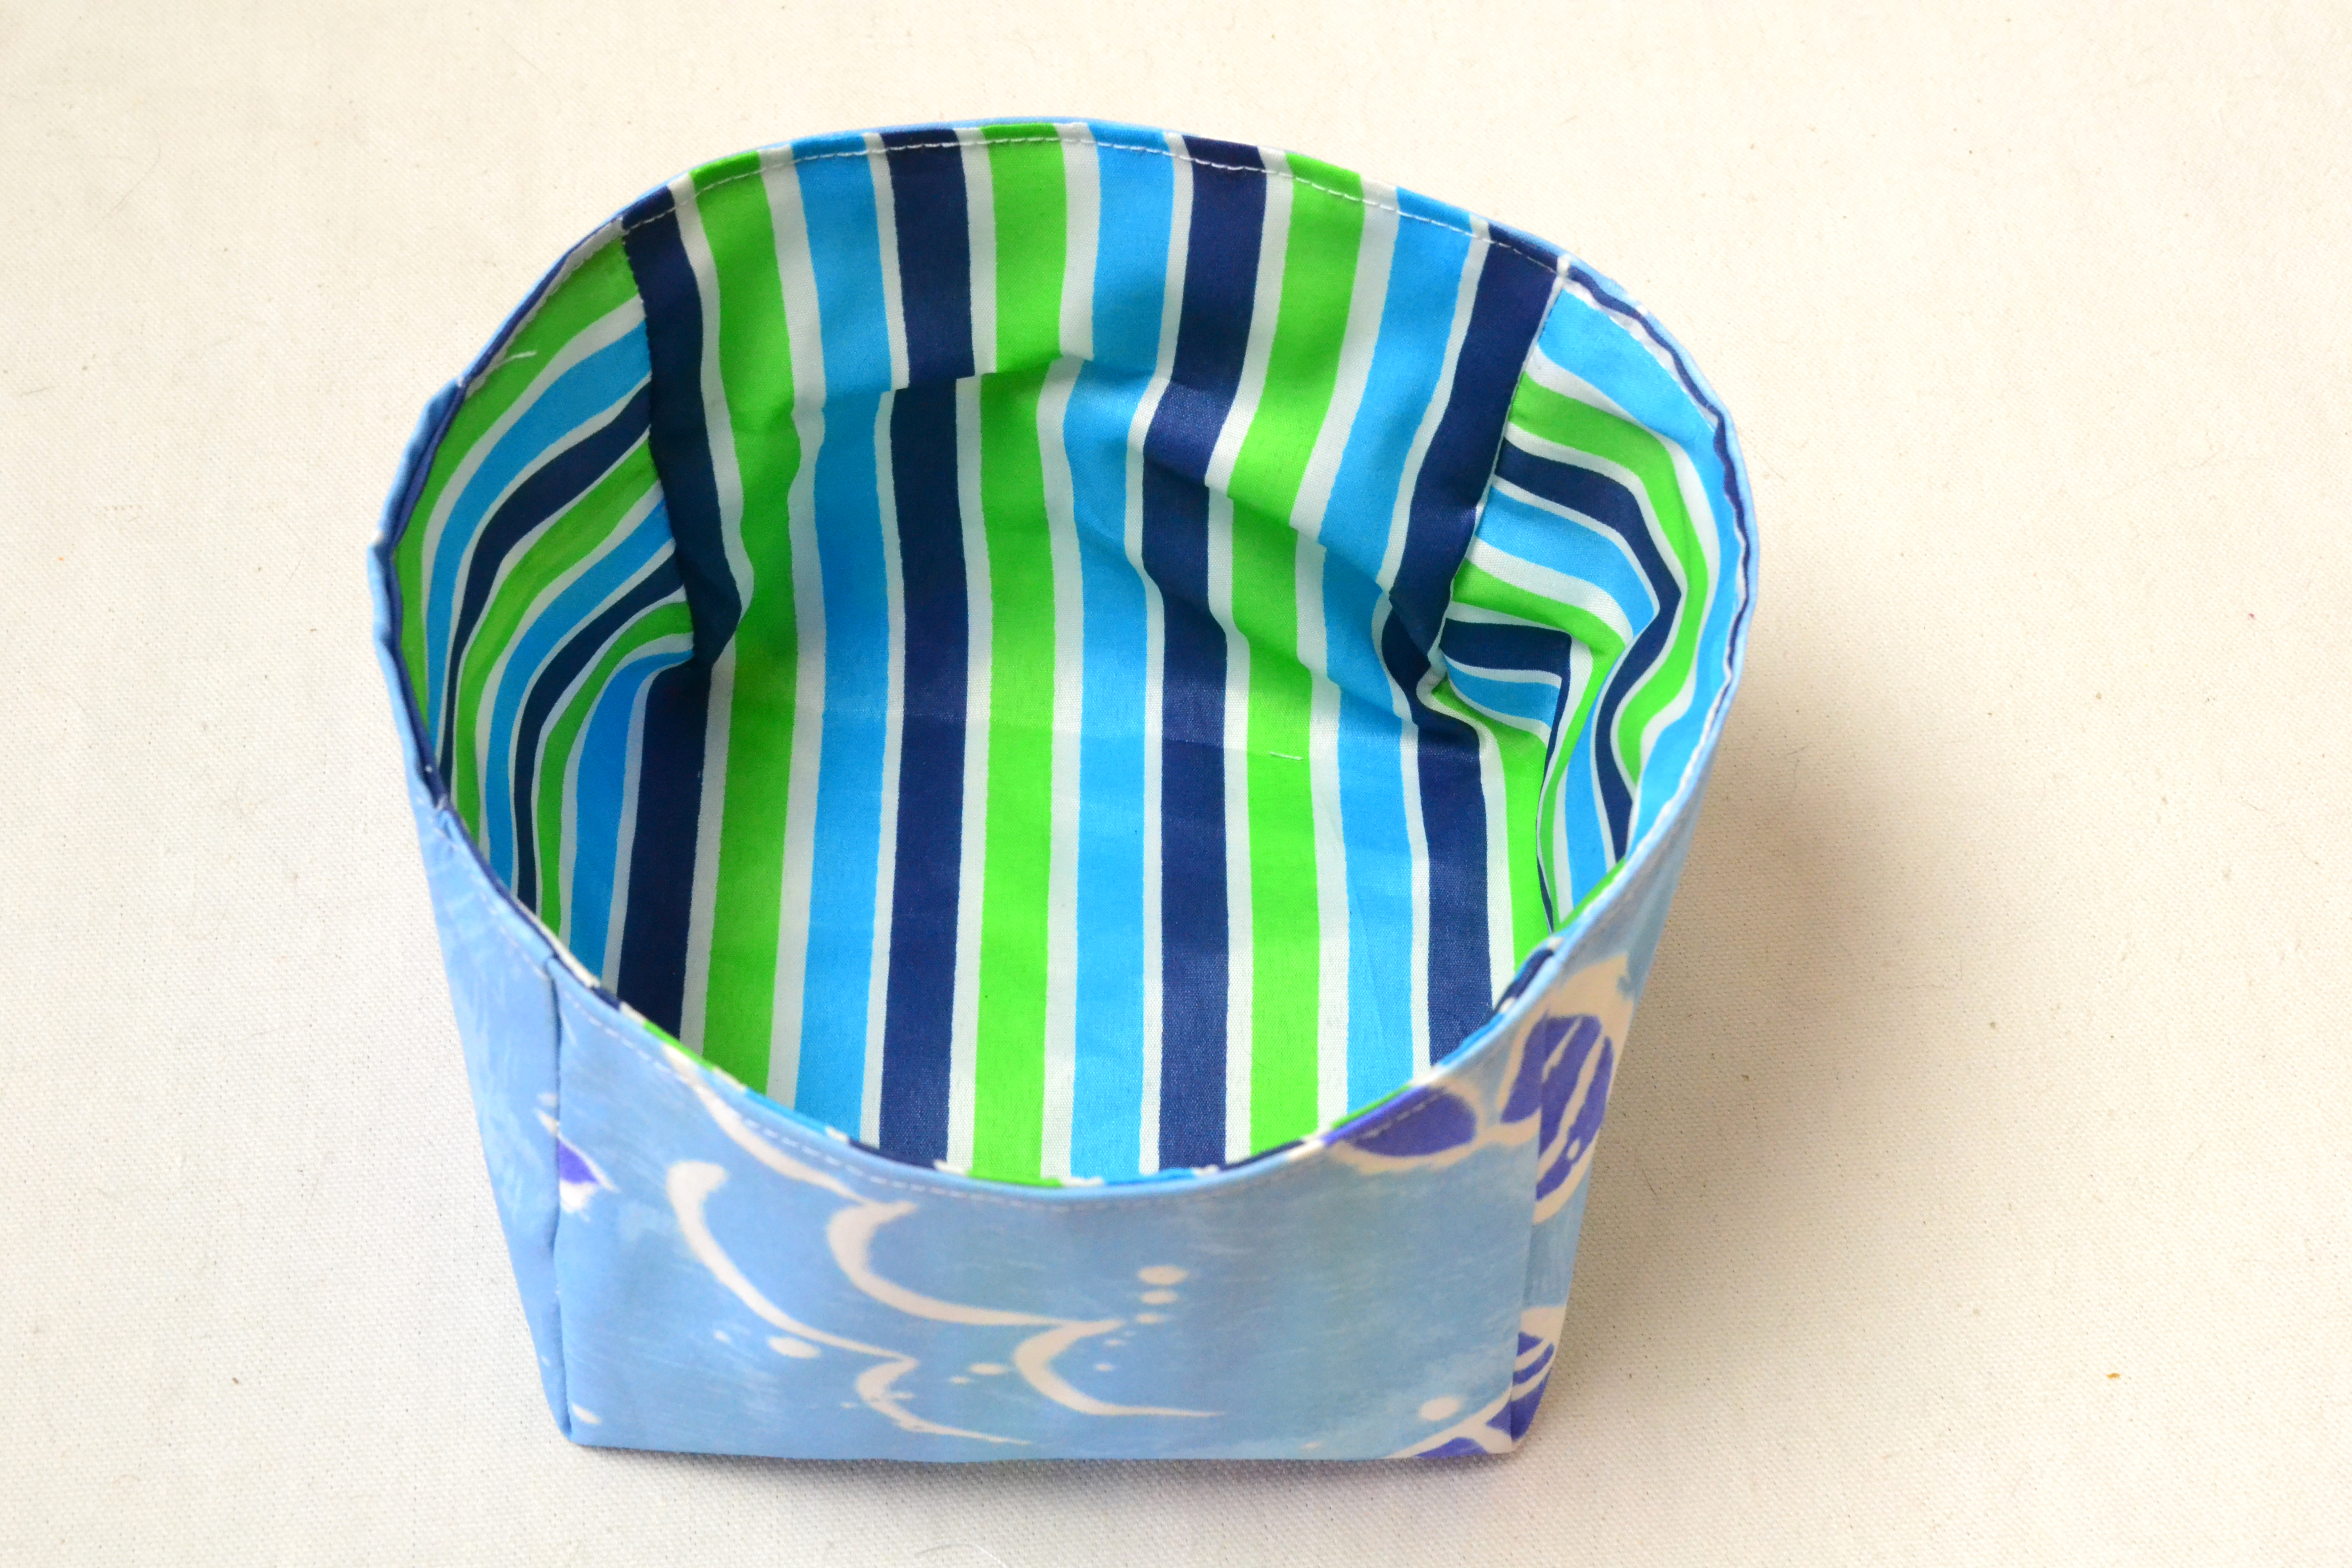

If your home has a talent for collecting tiny chaosspools of thread, hair ties, charging cords, candy wrappers that “mysteriously” appeared, and buttons from shirts nobody remembers owninga simple fabric box is a wonderful fix. It is practical, beginner-friendly, budget-friendly, and just fancy enough to make you feel like the sort of person who labels things on purpose.
The beauty of a fabric box is that it looks polished without demanding a fashion degree from your sewing machine. At its core, this project is just fabric, stabilizer, a few seams, and a little corner magic. Once you understand the construction, you can make a box for sewing notions, nursery supplies, gifts, bathroom storage, desk clutter, or the ever-expanding collection of “important little things” that somehow end up everywhere except where they belong.
In this tutorial, you will learn how to make a simple fabric box step by step, what materials give it structure, how to size it correctly, and which beginner mistakes to avoid. We will keep things straightforward, but not boring. Nobody needs a lecture from a storage bin.
Why a Simple Fabric Box Is a Great Beginner Sewing Project
A fabric box is one of the smartest projects for new sewists because it teaches several useful skills at once. You practice cutting accurately, sewing straight seams, attaching stabilizer, turning a project right side out, and topstitching for a crisp finish. Better yet, the result is something you will actually use instead of a mysterious rectangle destined for the “learning experience” drawer.
Unlike fitted garments, fabric boxes are forgiving. If a seam wobbles a little, nobody will call the sewing police. If you pick a fun print, the fabric does half the decorating for you. And if you make one that comes out slightly wonky, congratulations: you have just made a handmade item with personality.
What You Need to Make a Simple Fabric Box
- Outer fabric: quilting cotton, cotton canvas, linen-cotton blend, or light home décor fabric
- Lining fabric: quilting cotton works beautifully
- Stabilizer: fusible fleece for a soft structure, medium fusible interfacing for lighter support, or a heavier stabilizer if you want the box to stand very upright
- Matching thread
- Fabric scissors or rotary cutter and mat
- Ruler or quilting ruler
- Iron and ironing board
- Pins or sewing clips
- Sewing machine
- Fabric marking tool
If you want the easiest version possible, use cotton for both outer fabric and lining plus fusible fleece. That combination gives the box enough body to hold its shape without feeling stiff as a cereal box. If you want a more structured storage basket, move up to canvas or add a firmer stabilizer. Think of this like choosing between “cozy basket” and “small fabric architect.”
Best Fabric and Stabilizer Choices
Outer Fabric
For a beginner, quilting cotton is the safest choice because it is easy to cut, press, and sew. Cotton canvas gives a sturdier look and is excellent for utility boxes. Linen blends can look elegant but may fray more, so they reward careful handling.
Lining Fabric
Use a smooth cotton lining that presses well. Busy prints can hide small stitching mistakes, which is a charming little gift from the sewing universe.
Stabilizer
Stabilizer is what separates “adorable fabric box” from “sad cloth pancake.” Fusible fleece gives softness and structure. Medium fusible interfacing adds support without much bulk. Heavier products are better for larger bins that need to stand tall. For many small fabric box tutorials, sewists trim stabilizer slightly smaller than the fabric pieces so the seams are less bulky and the corners look cleaner.
Finished Size Math Made Easy
Here is the easiest sizing method for a square fabric box:
- Start with two outer squares and two lining squares.
- Cut a square from each bottom corner.
- When sewn, the cut-out depth becomes the approximate height of the box.
- The finished base width becomes the original square size minus twice the cut-out size.
Example: If you cut four 10-inch squares of fabric and remove 2.5-inch squares from the corners, your finished box will be about 5 inches wide and about 2.5 inches tall. That is a great size for clips, cosmetics, tea bags, or the dramatic number of charging adapters one household can somehow own.
For this tutorial, we will make a small, versatile box using 10-inch squares.
Cutting Instructions for a Simple Fabric Box
Cut the following:
- 2 outer fabric squares: 10 inches x 10 inches
- 2 lining fabric squares: 10 inches x 10 inches
- 2 fusible fleece or interfacing squares: 10 inches x 10 inches
Then cut a 2.5-inch square from each lower corner of all four fabric pieces. If your stabilizer tends to make bulky seams, trim it slightly smaller before fusingabout 1/4 inch less on all sides works well for many projects.
How to Make a Simple Fabric Box: Step-by-Step
Step 1: Fuse the Stabilizer
Press the stabilizer onto the wrong side of the outer fabric pieces according to the manufacturer’s instructions. Use steady heat, avoid sliding the iron around like you are scrubbing a pan, and let the pieces cool before moving them too much. This helps the adhesive bond properly.
Step 2: Sew the Outer Box
Place the two outer fabric pieces right sides together. Sew the side seams and the bottom seam, leaving the corner cut-outs open. Use a 1/2-inch seam allowance if you want a sturdy, beginner-friendly build.
Press the seams open if possible. A surprising amount of sewing success comes from pressing. Ironing is not glamorous, but neither is a lumpy basket.
Step 3: Box the Corners
Take one open corner and pinch it so the side seam aligns with the bottom seam. The cut-out will flatten into a straight line. Pin or clip it, then sew across that opening using the same seam allowance. Repeat on the other corner.
This is the step that turns “flat fabric object” into “actual box.” It feels a little like magic, which is one reason people keep making these things by the dozen.
Step 4: Sew the Lining
Repeat the same process with the lining pieces: sew side seams and bottom seam, then box the corners. But this time, leave a turning gap of about 3 inches in the bottom seam. That opening will let you pull the whole project right side out later.
Step 5: Insert Outer Box into Lining
Keep the outer box wrong side out. Turn the lining right side out. Then place the outer box inside the lining so the right sides are facing each other. Match the side seams and pin or clip around the top edge.
If everything suddenly looks inside out and mildly offensive to the eye, that is normal. Sewing often looks wrong right before it looks correct.
Step 6: Sew Around the Top Edge
Sew all the way around the top edge with your chosen seam allowance. Take your time where seams meet because those spots can get thick. A few clips around the edge will help keep everything aligned.
Step 7: Turn the Box Right Side Out
Reach through the opening in the lining and gently pull the entire project through. Use a turning tool, chopstick, or blunt point turner to push out the corners carefully. Do not attack the corners like you are digging for buried treasure. Gentle pressure works better.
Step 8: Close the Lining Opening
Tuck in the raw edges of the turning gap and sew it closed. You can do this by machine with a close edge stitch or by hand with a ladder stitch if you want a more invisible finish.
Step 9: Push the Lining Into the Box
Push the lining inside the outer box and shape the corners neatly. Press the top edge well. This is the moment when the project starts looking suspiciously professional.
Step 10: Topstitch the Rim
Topstitch around the top edge about 1/8 inch from the rim. This sharpens the shape, keeps the lining from rolling outward, and gives the box a clean finish. It is a small step that makes a big visual difference.
Optional Ways to Customize Your Fabric Box
Add a Cuff
Fold the top edge down to create a cuff. This gives the box a casual, stylish look and lets you show off the lining fabric.
Add Handles
Fabric handles or webbing loops are useful for larger boxes. Attach them before sewing the outer box to the lining.
Mix Fabrics
Use one print for the outside and a contrasting print inside. A floral outer and stripe lining can look cheerful. A neutral linen outside with black-and-white lining looks more modern.
Make It Reversible
If both sides look good, skip the heavy embellishments and let the box flip inside out for a second style.
Use Specialty Structure
For larger organizers, some makers add firmer stabilizers or even boning along the sides. That is not necessary for a simple box, but it is helpful once you move up to taller storage bins.
Common Mistakes and How to Avoid Them
1. Choosing Fabric That Is Too Flimsy
Light cotton without stabilizer often collapses. If you want shape, give the project support.
2. Forgetting to Leave a Turning Gap
This classic mistake causes a brief but memorable emotional event. Leave the opening in the lining bottom seam.
3. Cutting Corners Inconsistently
If one corner cut-out is even a little different, the box may wobble. Measure carefully.
4. Skipping Pressing
Pressed seams create cleaner edges, flatter construction, and a more finished look. Your iron is not optional decoration.
5. Using Too Much Bulk in the Seams
If your stabilizer is very thick, trim it slightly smaller or grade the seam allowances. This helps the top edge look crisp instead of chunky.
Where to Use a Simple Fabric Box
- On a sewing table for clips, chalk, and snips
- In a nursery for socks, pacifiers, or washcloths
- On a desk for sticky notes and cords
- In a bathroom for cotton balls or travel toiletries
- In a kitchen for tea bags, snack bars, or napkins
- As gift packaging filled with treats or craft supplies
This is one of those rare sewing projects that is both cute and genuinely useful. It can hold clutter, disguise clutter, or become a gift that looks much more expensive than it was. That is what we call a beautiful relationship.
How to Scale the Pattern Up or Down
Once you master one box, you can resize it easily. Use larger starting squares and increase the cut-out corner size for a bigger basket. Use smaller squares for tiny trinket containers. For example:
- 8-inch squares with 2-inch corners: tiny organizer
- 10-inch squares with 2.5-inch corners: medium box
- 12-inch squares with 2.75-inch corners: roomy storage box
- 14-inch squares with 3-inch corners: larger catch-all bin
If the box gets bigger, increase the structural support too. A giant basket made from soft quilting cotton alone will slump like it just heard bad news.
Conclusion
Learning how to make a simple fabric box is one of the most satisfying skills in beginner sewing. It is fast enough to finish in an afternoon, useful enough to make again, and flexible enough to fit almost any room in the house. With a few squares of fabric, a stabilizer that suits your goals, and some neatly sewn boxed corners, you can turn flat fabric into a polished organizer that actually earns its keep.
The real charm of this project is how easily it grows with your confidence. Your first box may be simple. Your second might get a cuff. Your third may show up with handles, contrast lining, and a personality problem. By the fourth, you may be walking around the house measuring random shelves and whispering, “I can make a box for that.” And honestly? You probably can.
Extra Notes and Real-World Experience With Making Fabric Boxes
One of the most interesting things about sewing a simple fabric box is how quickly it teaches you what “small details” really mean in sewing. On paper, the project looks almost comically basic: cut squares, remove corners, sew seams, turn, press, topstitch, done. In real life, those little details decide whether the final box looks handmade in the best way or handmade in the “well, it certainly exists” way.
A lot of people discover on their first attempt that structure matters more than expected. A pretty print can lure you into false confidence, but if the fabric has no support, the box will act less like a box and more like a sleepy napkin. That is why many experienced sewists become surprisingly passionate about interfacing and fusible fleece. Nobody starts a sewing hobby thinking, “I can’t wait to have strong opinions about stabilizer,” and yet here we are.
Another common experience is learning that cutting accuracy is not just a polite suggestion. If your corner cut-outs differ by even a small amount, one side may sit taller, one corner may puff, and the base may twist slightly. The box will still function, but it will have the sort of uneven confidence usually seen in folding card tables. After making one or two, most sewists start measuring corners much more carefully, and suddenly the results improve dramatically.
Pressing also tends to convert skeptics. Plenty of beginners think sewing is mainly about stitching, and then they make a fabric box and realize the iron is basically the project’s quiet overachiever. Pressed seams lie flatter, corners shape better, top edges behave, and the finished box looks crisp instead of rumpled. It is not glamorous, but neither are most truly helpful things in life.
Then there is the topstitching phase, where the box really comes alive. Before topstitching, the project can look soft and slightly confused. After topstitching, it suddenly looks intentional. Clean. Finished. The kind of item people pick up and ask, “Wait, you made this?” That one line of stitching around the rim does more visual work than it has any right to.
Perhaps the best experience, though, is what happens after the first successful box. You stop seeing it as a single project and start seeing it as a formula. Need a catch-all by the front door? Make a fabric box. Want prettier storage on a bathroom shelf? Fabric box. Need a handmade gift that is useful, affordable, and easy to personalize? Once again, fabric box. The project becomes less of a tutorial and more of a dependable little system.
That is why this design stays popular. It is beginner-friendly, but it does not feel childish. It is practical, but still creative. And it gives you the very satisfying experience of turning a few flat pieces of fabric into something three-dimensional, tidy, and genuinely charming. In a world full of disposable storage, making your own simple fabric box feels refreshingly smart. Also, it is a wonderful excuse to buy more fabric, which may or may not solve your clutter problem in the long term.
SEO Tags