
Note: This article is written for web publishing and is based on real additive manufacturing practices, engineering design principles, and current industry knowledge. Source links are not inserted into the article body as requested.
What Are Steel-Reinforced 3D Prints?
Steel-reinforced 3D prints are 3D printed parts that use steel to improve strength, durability, load resistance, or long-term reliability. In plain English: they are printed parts that decided regular plastic life was too fragile and invited steel to the party.
The phrase can describe several different approaches. A maker might print a plastic bracket with a steel rod embedded inside. An engineer might design a nylon fixture with steel threaded inserts so screws can be tightened again and again without chewing up the plastic. A manufacturer might print metal-filled filament that becomes stainless steel after debinding and sintering. In construction, the idea may even refer to 3D printed concrete structures that require steel rebar, mesh, cable, or other reinforcement to handle real structural loads.
That variety matters because “steel-reinforced 3D prints” is not one single technology. It is a family of hybrid manufacturing strategies. The goal is usually simple: keep the flexibility, speed, and design freedom of 3D printing while adding the toughness and reliability of steel exactly where the part needs it most.
Why Steel Reinforcement Matters in 3D Printing
3D printing is brilliant, but it has limits. FDM prints, for example, are built layer by layer. That means strength is often directional. A part may be strong along the printed lines but weaker between layers, especially if the load tries to pull those layers apart. Even high-quality materials such as PETG, ABS, ASA, nylon, polycarbonate, or carbon-fiber-filled filament can fail when stress is concentrated around holes, screw bosses, thin walls, or long bending sections.
Steel reinforcement helps solve some of these problems by letting the print do what it does bestcreate complex geometrywhile steel handles what it does best: tension, compression, wear, threads, alignment, or impact. Think of it like a superhero team-up. Plastic provides the shape, steel provides the backbone, and together they avoid the embarrassing “snap” sound that ruins prototypes and moods.
Common reasons to reinforce a 3D print with steel include:
- Improving stiffness in long or thin parts
- Preventing screw holes from stripping
- Increasing resistance to repeated assembly and disassembly
- Adding weight or balance to a part
- Improving durability under vibration
- Creating stronger brackets, mounts, jigs, fixtures, and tool holders
- Reducing flex in functional prototypes
Main Types of Steel-Reinforced 3D Prints
There are several practical ways to combine steel and 3D printing. The best choice depends on the part’s job, the printing process, the material, the budget, and how much post-processing you are willing to tolerate before saying, “Maybe I should have just bought the metal part.”
1. Steel Rods, Pins, or Wires Embedded in Plastic Prints
One of the most straightforward methods is to design a channel inside the 3D printed part and insert a steel rod, dowel pin, wire, or threaded rod. The print may be paused mid-build so the steel element can be placed inside, then printing resumes over it. Another option is to print the part in two halves, place the steel reinforcement inside, and bond the halves together with screws, adhesive, solvent welding, or mechanical clips.
This approach is especially useful for long parts that bend too easily. For example, a printed handle, lever, shelf bracket, robot arm, camera rig, or drawer support may become much stronger when a steel rod runs through the load path. The key is not just “add metal somewhere and hope.” The steel needs to be positioned where stress actually travels through the part.
In bending applications, steel is usually most effective when placed away from the neutral axis, meaning closer to the outer surfaces that experience tension and compression. In simple terms, if a printed beam bends like a diving board, the top and bottom surfaces do the hardest work. Reinforcing those areas is more useful than hiding steel randomly in the middle like a secret snack.
2. Heat-Set and Press-Fit Steel or Metal Inserts
Threaded inserts are one of the most popular reinforcement methods for 3D printed parts. While many inserts are brass, steel inserts are also used when higher wear resistance or specific mechanical properties are required. A threaded insert gives a printed plastic part a durable internal thread for machine screws.
This is a big deal because printed threads can wear out quickly, especially in smaller sizes. Tapping plastic can work for light-duty parts, but repeated assembly often damages the thread. Inserts make the connection more professional, reusable, and reliable. They are commonly used in electronics enclosures, robotics frames, fixtures, machine guards, brackets, consumer product prototypes, and custom tools.
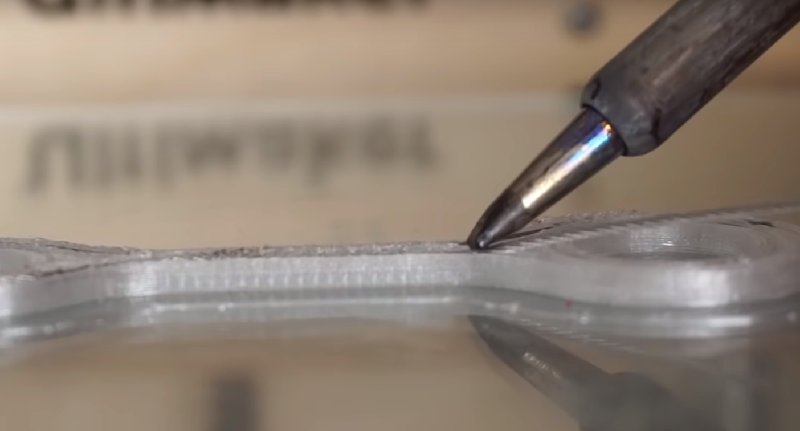
Heat-set inserts are installed by warming the insert and pressing it into a designed hole. The surrounding plastic softens and flows around the knurled outer surface. When it cools, the insert is mechanically locked in place. Press-fit inserts rely more on interference and geometry. Both methods require careful hole sizing, enough wall thickness, and a design that avoids cracking the printed boss.
3. Steel Screws, Bolts, and Fasteners as Structural Members
Sometimes the reinforcement is not hidden inside the print. It is part of the assembly. A printed bracket can be designed around steel bolts that carry clamping loads. A printed hinge can use a steel pin as the rotating axis. A printed wheel can use a steel shaft. A printed jig can use steel shoulder bolts, washers, and nuts to create repeatable alignment.
This hybrid design mindset is often better than trying to make the printed plastic do everything. The smartest 3D printed parts do not pretend to be magic. They give each material a job. Plastic handles shape, ergonomics, cable routing, covers, spacers, and lightweight structure. Steel handles wear, threads, shafts, preload, and high-stress contact points.
4. Metal-Filled Filament and Stainless Steel 3D Printing
Another category involves printing with metal-filled filament, such as stainless-steel composite filament. These materials are not the same as ordinary “metal-look” decorative filament. In true metal filament systems, the filament contains a high percentage of metal powder mixed with a polymer binder. The part is printed in a “green” state, then debound and sintered so the binder is removed and the metal particles fuse into a dense metal component.
Stainless steel materials such as 17-4 PH and 316L have been used in additive manufacturing for functional metal parts, tooling, fixtures, prototypes, and low-volume components. However, this workflow is more involved than printing PLA on a desktop machine. Shrinkage during sintering must be predicted, part geometry must be compatible with post-processing, and the final properties depend heavily on process control.
For web readers, the practical takeaway is simple: metal filament is not the same as placing a steel rod inside a plastic print. It is closer to making an actual metal part through a multi-step manufacturing process. It can be powerful, but it is not the cheapest or easiest route for every project.
5. Steel Reinforcement in 3D Printed Concrete
Steel-reinforced 3D prints also appear in construction, where 3D printed concrete has attracted attention for walls, forms, architectural components, bridge elements, and experimental structures. Concrete is strong in compression but weak in tension. That is why conventional concrete often uses steel rebar, mesh, cables, or other reinforcement. The same structural reality applies to 3D printed concrete.
One of the biggest challenges in 3D printed construction is integrating reinforcement into automated printing workflows. Printed concrete can create complex forms with less traditional formwork, but buildings and infrastructure still require serious engineering, code compliance, inspection, and load analysis. In other words, printing a wall is impressive; making that wall safe, reinforced, approved, and durable is where the grown-up engineering begins.
Best Materials for Steel-Reinforced 3D Prints
The base print material matters because steel reinforcement does not magically fix a poor material choice. A steel rod inside a brittle or heat-sensitive plastic can still leave you with a part that deforms, cracks, or fails around the reinforcement.
PLA
PLA is easy to print and works well for prototypes, jigs, display models, and low-temperature indoor parts. It can be reinforced with inserts, rods, or fasteners, but it softens at relatively low temperatures and can be brittle under impact. PLA is great for learning the method, but it is not always ideal for demanding functional parts.
PETG
PETG offers better toughness and temperature resistance than PLA in many practical applications. It is a popular choice for brackets, fixtures, covers, and hobby engineering projects. PETG works well with threaded inserts and embedded hardware when designed with proper wall thickness.
ABS and ASA
ABS and ASA are useful for parts that need improved heat resistance and impact toughness. ASA adds better UV resistance, making it a good option for outdoor applications. These materials can benefit from steel inserts, screws, and rods, especially in enclosures, automotive-style prototypes, and tool housings.
Nylon and Carbon-Fiber-Filled Nylon
Nylon is tough, fatigue-resistant, and widely used for functional parts. Carbon-fiber-filled nylon adds stiffness and dimensional stability. When combined with metal inserts or steel pins, nylon-based prints can become excellent candidates for jigs, fixtures, robotics components, and manufacturing aids.
Polycarbonate
Polycarbonate is strong and heat resistant, but it requires higher printing temperatures and good printer control. Steel reinforcement can help create durable high-load components, but the design must account for thermal expansion, print orientation, and stress concentrations.
Design Principles for Strong Steel-Reinforced Prints
The biggest mistake people make with steel-reinforced 3D prints is assuming reinforcement is a shortcut around design. It is not. Reinforcement works best when the part is designed around it from the beginning.
Design Around the Load Path
Every functional part has a load path: the route force takes through the material. A steel rod placed outside that path may look impressive but do very little. Before adding steel, ask: Where does the part bend? Where does it twist? Where do screws pull? Where does vibration concentrate? Where would it fail first?
For example, if a printed wall bracket fails at the screw holes, adding a steel rod through the middle of the arm may not help much. Steel washers, inserts, thicker bosses, better layer orientation, or a metal backing plate may be more useful. Reinforcement should solve the actual problem, not the one that looks coolest in a timelapse video.
Leave Enough Wall Thickness
Steel needs surrounding material to transfer load. If a rod or insert is placed too close to the edge of a print, the plastic around it may split. Bosses for threaded inserts should have enough diameter and depth. Channels for rods should leave enough material above, below, and beside the steel. Thin walls plus aggressive press-fit hardware equal cracking, sadness, and possibly a small lecture from your printer.
Use Fillets Instead of Sharp Corners
Sharp internal corners create stress concentrations. Fillets help distribute stress and make parts less likely to crack. This is especially important around holes, channels, insert bosses, and transitions from thick to thin sections. A small radius can make a big difference in functional 3D printed parts.
Mind Print Orientation
Print orientation affects strength. If the main load pulls layers apart, the part may fail even with steel reinforcement. For brackets, hooks, clamps, and hinges, orient the print so layer lines support the expected forces as much as possible. Steel can help, but it should not be asked to rescue a part from a terrible orientation.
Plan for Tolerances
Steel rods, pins, bolts, and inserts have real dimensions. Printed holes also have real-world variation. A 6 mm hole in CAD may not produce a perfect 6 mm hole on your printer. Test coupons are your friend. Print a small sample with different hole sizes before committing to a 14-hour print that discovers tolerance the hard way.
Advantages of Steel-Reinforced 3D Prints
Steel-reinforced 3D prints can be incredibly useful because they combine fast customization with real mechanical improvements. For one-off parts, custom jigs, replacement brackets, and low-volume fixtures, this hybrid method can save time and money.
Another advantage is targeted strength. Instead of printing the entire part from an expensive engineering material or machining it fully from metal, you can reinforce only the areas that need it. This can reduce cost, weight, and production complexity. A plastic handle with a steel core may be lighter and easier to shape than a fully machined handle. A printed enclosure with steel inserts may be cheaper than an injection-molded version during early product development.
Steel reinforcement also improves serviceability. Parts with inserts can be opened and closed repeatedly. This matters for electronics enclosures, robot covers, inspection panels, battery boxes, and maintenance-friendly designs. A screw that strips plastic after three uses is not a feature. It is a countdown timer.
Limitations and Common Failure Points
Steel-reinforced 3D prints are not invincible. The bond between steel and plastic can be a weak point. Steel and thermoplastics expand differently with temperature. Smooth steel rods may slide if the design does not include mechanical locking features. A badly placed insert can split a boss. A reinforced part can also become too stiff in one area, causing failure somewhere else.
Corrosion is another consideration. Stainless steel resists corrosion better than plain carbon steel, but environment still matters. Outdoor parts, marine environments, chemical exposure, and high humidity can create problems if the wrong hardware is selected. Designers should also think about galvanic corrosion when different metals are used together.
Finally, steel reinforcement can complicate recycling and repair. A pure plastic print is easy to reprint or recycle in limited workflows. A hybrid steel-plastic component may need disassembly before disposal or repair. For professional products, this should be considered during design.
Practical Examples of Steel-Reinforced 3D Prints
Robotics Brackets
Robotics teams often use 3D printing for custom mounts, sensor brackets, and lightweight frames. Steel inserts and bolts make these parts more durable under vibration. A printed servo mount with steel threaded inserts can survive repeated maintenance far better than a mount with screws driven directly into plastic.
Workshop Jigs and Fixtures
Manufacturing jigs frequently need custom shapes, fast turnaround, and reliable hardware. A printed drill guide can use steel bushings to prevent wear. A clamping fixture can use steel threaded inserts for repeatable tightening. A positioning block can use steel dowel pins for alignment.
Camera and Audio Equipment
Custom camera rigs, microphone mounts, and lighting brackets often benefit from steel-reinforced joints. Printed parts provide ergonomic shapes and custom geometry, while steel screws, threaded inserts, or rods handle the repeated tightening that comes with field use.
Automotive Prototypes
For non-critical prototypes, steel-reinforced prints can help test fitment, routing, and ergonomics. ASA, nylon, or polycarbonate parts with steel inserts may be useful for mockups and low-load interior components. However, safety-critical automotive parts require professional engineering, material validation, and proper manufacturing controls.
Furniture and Home Repair Parts
Steel rods can stiffen printed brackets, handles, drawer supports, and replacement hardware. This is where the technology feels wonderfully practical. A small custom part can rescue a chair, cabinet, lamp, or appliance knob from the landfillassuming the design is sensible and the load is not beyond the material’s ability.
How to Make Steel-Reinforced 3D Prints More Reliable
Start with the simplest reinforcement that solves the problem. If screws keep stripping, use inserts. If a beam bends, add a rod or redesign the geometry with ribs. If a hinge wears out, use a steel pin. If a part needs full metal properties, consider a true metal printing workflow rather than pretending plastic with metal dust is a miracle alloy.
Use test pieces before printing large parts. Test insert hole sizes, rod fit, adhesive compatibility, and layer orientation. Keep records of what works. A small spreadsheet of hole diameters, insert types, print materials, and successful settings can save hours of future frustration.
Also, avoid overbuilding blindly. More steel is not always better. Extra reinforcement can add weight, shift stress, increase print complexity, and make assembly harder. Smart reinforcement is targeted, not theatrical. The goal is not to turn every print into a medieval fortress with layer lines.
Future of Steel-Reinforced 3D Printing
The future of steel-reinforced 3D prints is likely to be hybrid. Engineers are already combining additive manufacturing with conventional hardware, metal inserts, composite fibers, machining, casting, and automated assembly. Instead of asking whether 3D printing will replace traditional manufacturing, the better question is: how can 3D printing work with traditional manufacturing to produce better parts faster?
In desktop printing, expect better slicer workflows for pause-and-insert operations, smarter design libraries for insert bosses, and more reliable engineering-grade filaments. In industrial settings, expect more hybrid systems that combine printed polymers, metal reinforcement, continuous fibers, and post-processing. In construction, reinforcement automation will remain a major research and engineering challenge as 3D printed concrete moves from demonstration projects toward broader practical use.
Steel-reinforced 3D printing is not about replacing steel or replacing plastic. It is about using both intelligently. That is the magic: not a single material trying to do everything, but a carefully designed partnership.
Experience-Based Notes: What Working With Steel-Reinforced 3D Prints Teaches You
After working with steel-reinforced 3D prints, one lesson becomes obvious: the best reinforcement is usually boring. That may sound disappointing, but it is good news. The most reliable solutions are often simple steel pins, threaded inserts, washers, rods, or bolts placed exactly where the part needs support. The flashy designs look great online, but the practical designs survive on the workbench.
A common beginner experience is printing a part with high infill and assuming it will be strong enough. Then the screw hole strips, the bracket flexes, or the layers split. The first instinct is usually to increase infill to 80% or 100%. Sometimes that helps, but often it just wastes filament. A better fix might be adding a steel insert, changing the print orientation, thickening the boss, or adding ribs. Infill is not a personality trait. It does not need to be extreme to be useful.
Another experience worth mentioning is the importance of dry runs. Before embedding a steel rod mid-print, it helps to practice the pause, insertion, and resume sequence on a smaller test part. Printers can ooze during pauses, rods can sit slightly too high, and magnets or tools near the hotend can create awkward moments. A test print catches these issues before they ruin the real part.
Heat-set inserts also teach patience. If the insert is pushed in too fast, it can melt too much plastic and sink crooked. If it is not hot enough, it may tear the surrounding wall instead of flowing into place. The best results usually come from steady pressure, proper hole size, a clean tip, and letting the insert cool before adding a screw. It is a tiny operation, but it rewards calm hands. Basically, it is the espresso shot of mechanical assembly: small, hot, and easy to mess up if you rush.
Adhesives can be helpful, but they should not be treated as magic glue goblins. Epoxy may improve the bond around a steel rod, but surface preparation matters. Smooth steel can benefit from roughening, cleaning, or mechanical features that prevent slipping. In some designs, a rod with grooves, flats, bends, cross holes, or end stops performs better than a perfectly smooth rod. Mechanical locking is often more reliable than relying on adhesive alone.
One of the best habits is labeling test parts. Print small samples with different hole sizes and mark them directly in the model: 5.8 mm, 5.9 mm, 6.0 mm, 6.1 mm. After printing, test the actual steel rod or insert. This turns guesswork into data. Every printer, filament, nozzle, and slicer profile behaves a little differently. The perfect hole on one machine may be too tight on another. That is not failure; that is manufacturing politely reminding you it has opinions.
For functional prints, steel reinforcement works best when paired with thoughtful geometry. Ribs, gussets, fillets, thicker bosses, washers, and better layer orientation often matter as much as the steel itself. A reinforced part should feel like a system, not a plastic object with metal randomly shoved inside it. When design, material, and reinforcement all support the same load path, the part becomes dramatically more dependable.
The final experience is perhaps the most useful: steel-reinforced 3D prints encourage better engineering judgment. They force you to ask what the part must actually do. Does it need stiffness, wear resistance, thread durability, impact strength, heat resistance, or just a little more confidence? Once the real need is clear, the reinforcement choice becomes much easier. That is when 3D printing stops being only a prototyping trick and starts becoming a practical manufacturing tool.
Conclusion
Steel-reinforced 3D prints are one of the most practical ways to make additive manufacturing stronger, more durable, and more useful in the real world. Whether you are adding threaded inserts to an electronics enclosure, embedding a steel rod in a long bracket, designing a fixture around steel pins, or exploring stainless steel additive manufacturing, the core idea is the same: use the right material in the right place.
The best results come from planning. Design around load paths, allow enough wall thickness, use fillets, test tolerances, and choose materials that match the environment. Steel reinforcement is not a shortcut for poor design, but when used well, it can transform a 3D printed part from “nice prototype” into “actually useful tool.” And in the world of 3D printing, that is the difference between a shelf decoration and something that survives Monday morning.
SEO Tags